20 Easy DIY Home Decor Projects You Can Do This Weekend
You do not need a workshop, a truck full of tools, or a contractor’s budget to make your home feel completely different. You need a free weekend, a few basic supplies, and projects that are honestly sized for real life.
Every project on this list was chosen with three rules: a beginner can finish it in a day or less, it costs far less than buying the finished thing, and the “after” makes people ask who did it for you. They also build on each other — the painting skills from Project 1 carry you through half the list.
Work in order if you are new to DIY. Each project teaches you something small that the next one uses, and by Project 10 you will be looking at your home like a person who can change anything in it. Because you can.
In this guide
- The Painting Projects (Start Here)
- No-Tool & Rental-Friendly Upgrades
- Weekend Builds With Basic Tools
- More Weekend Projects to Try Next
- Before You Start: Skills, Safety & Setup
- When a Project Goes Wrong (It Will, and It Is Fine)
- The Project Planner: Time, Cost & Difficulty at a Glance
- The Starter Toolkit, in Detail
- How to Recreate These Projects in the Right Order
- Real-Life Problems, Solved
- Budget Guide: Where to Save, Where to Spend
- Mistakes to Avoid
- Your DIY Starter Checklist
- Frequently Asked Questions
The Painting Projects (Start Here)
Paint is the highest-impact, lowest-cost tool in all of home decorating. These three projects prove it.
1. Paint a Tired Piece of Furniture
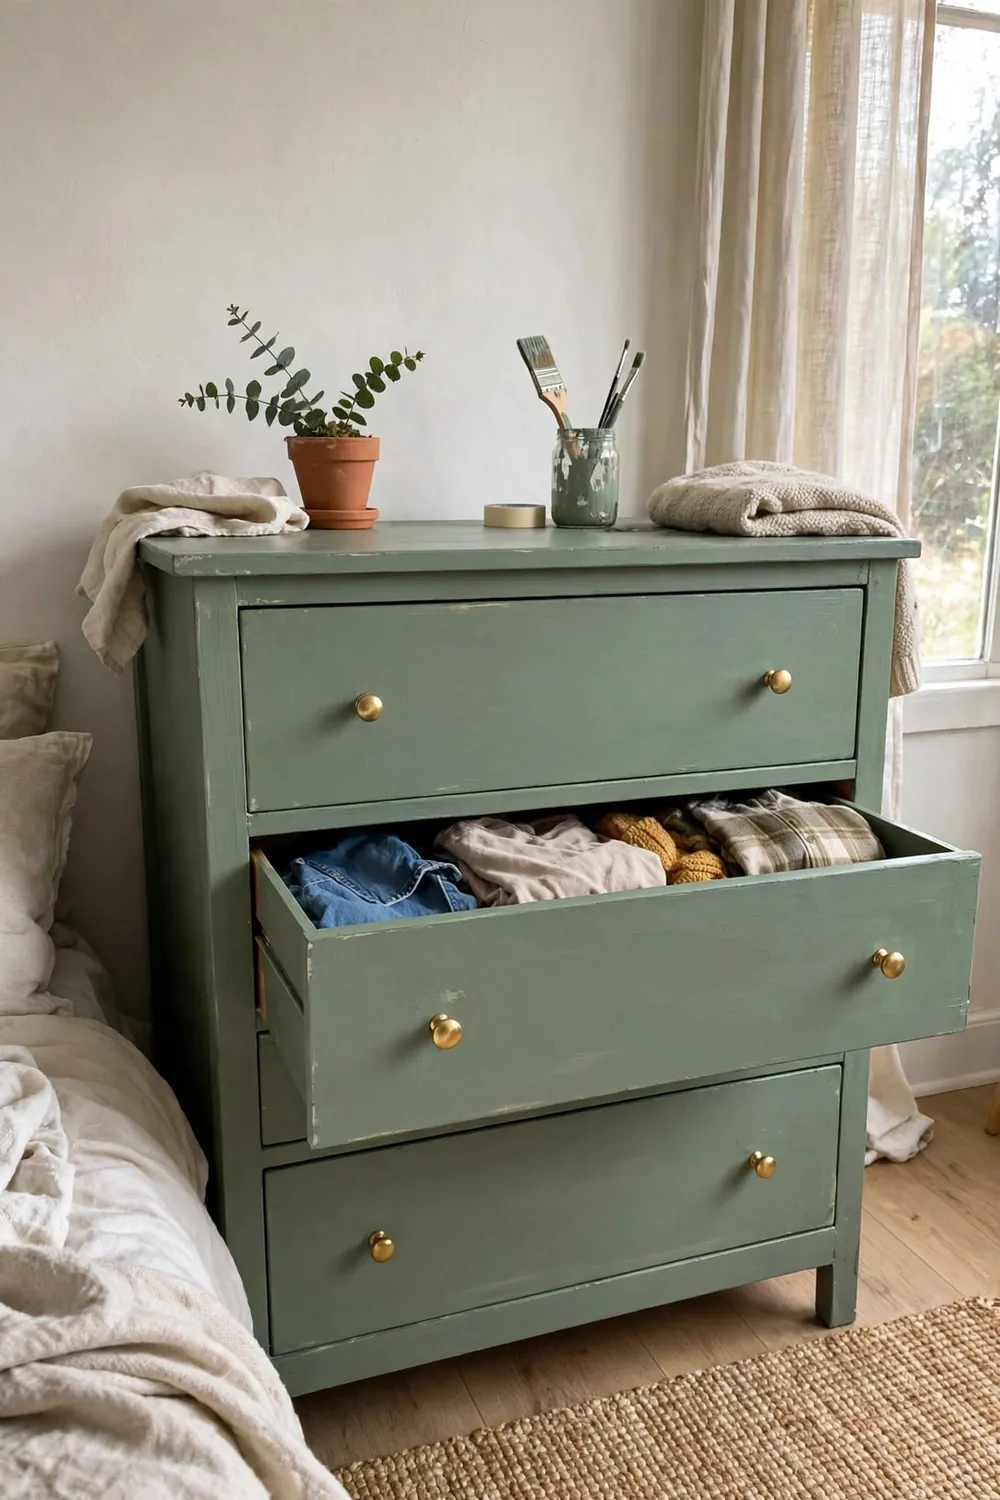
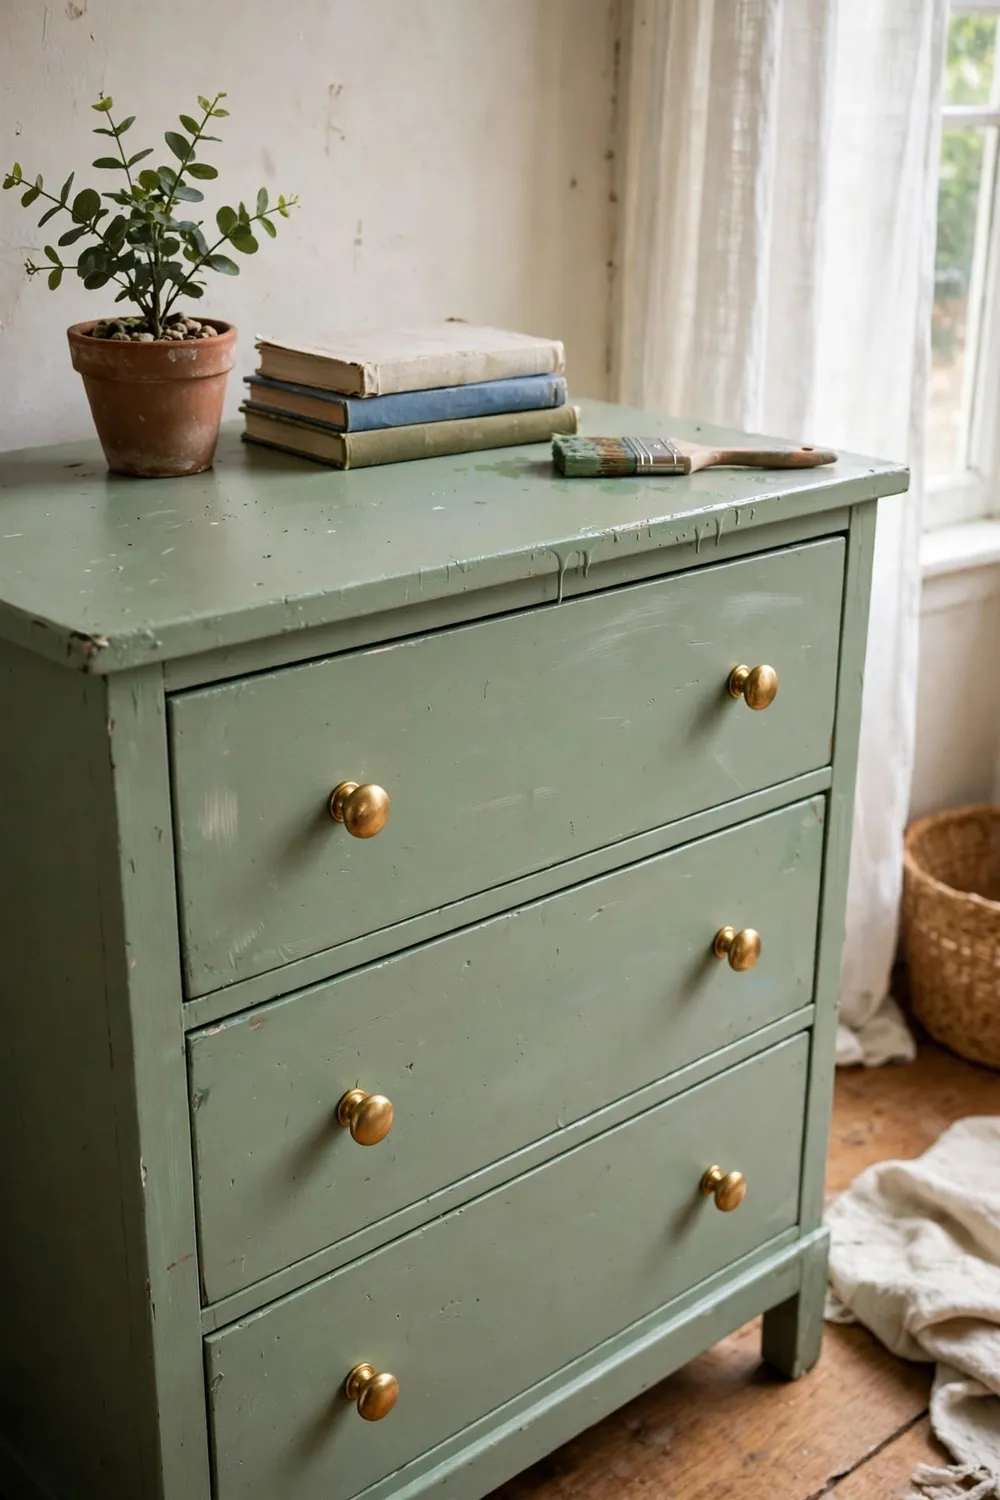
A dated dresser, side table, or set of dining chairs becomes the best-looking thing in the room with one coat of the right paint. Clean the piece well, scuff-sand glossy surfaces lightly, prime if the finish is dark or shiny, then apply two thin coats of paint with a small foam roller for a smooth finish.
Finish with new knobs or handles — hardware is the jewelry of furniture, and swapping it changes the piece as much as the paint does. Budget: $20–$45 for paint and hardware. Time: one afternoon, plus drying.
2. Paint Your Interior Doors a Color
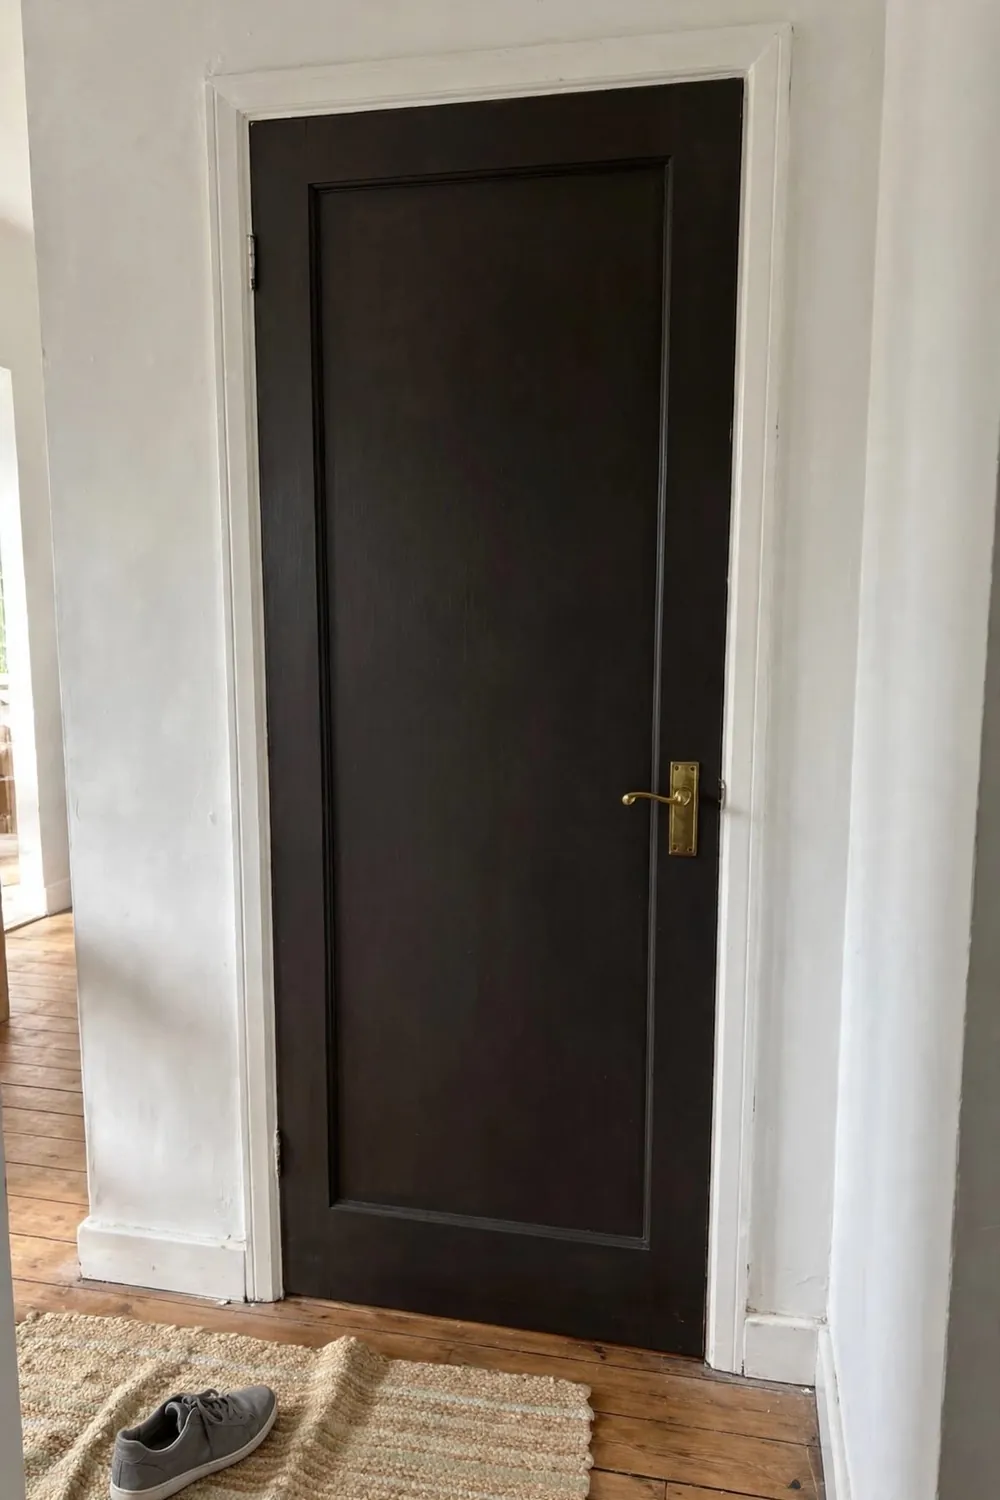
White doors disappear; a colored door is architecture. Soft sage, warm greige, dusty blue, or classic black on interior doors makes a plain hallway look designed. You do not even need to do them all — start with the one you see most.
Remove the handle, paint with a roller for the flat areas and a brush for the panels, and let it dry fully before rehanging hardware. Budget: under $25 per door. This is the project guests comment on most, relative to how easy it is.
3. Limewash or Color-Wash One Accent Wall
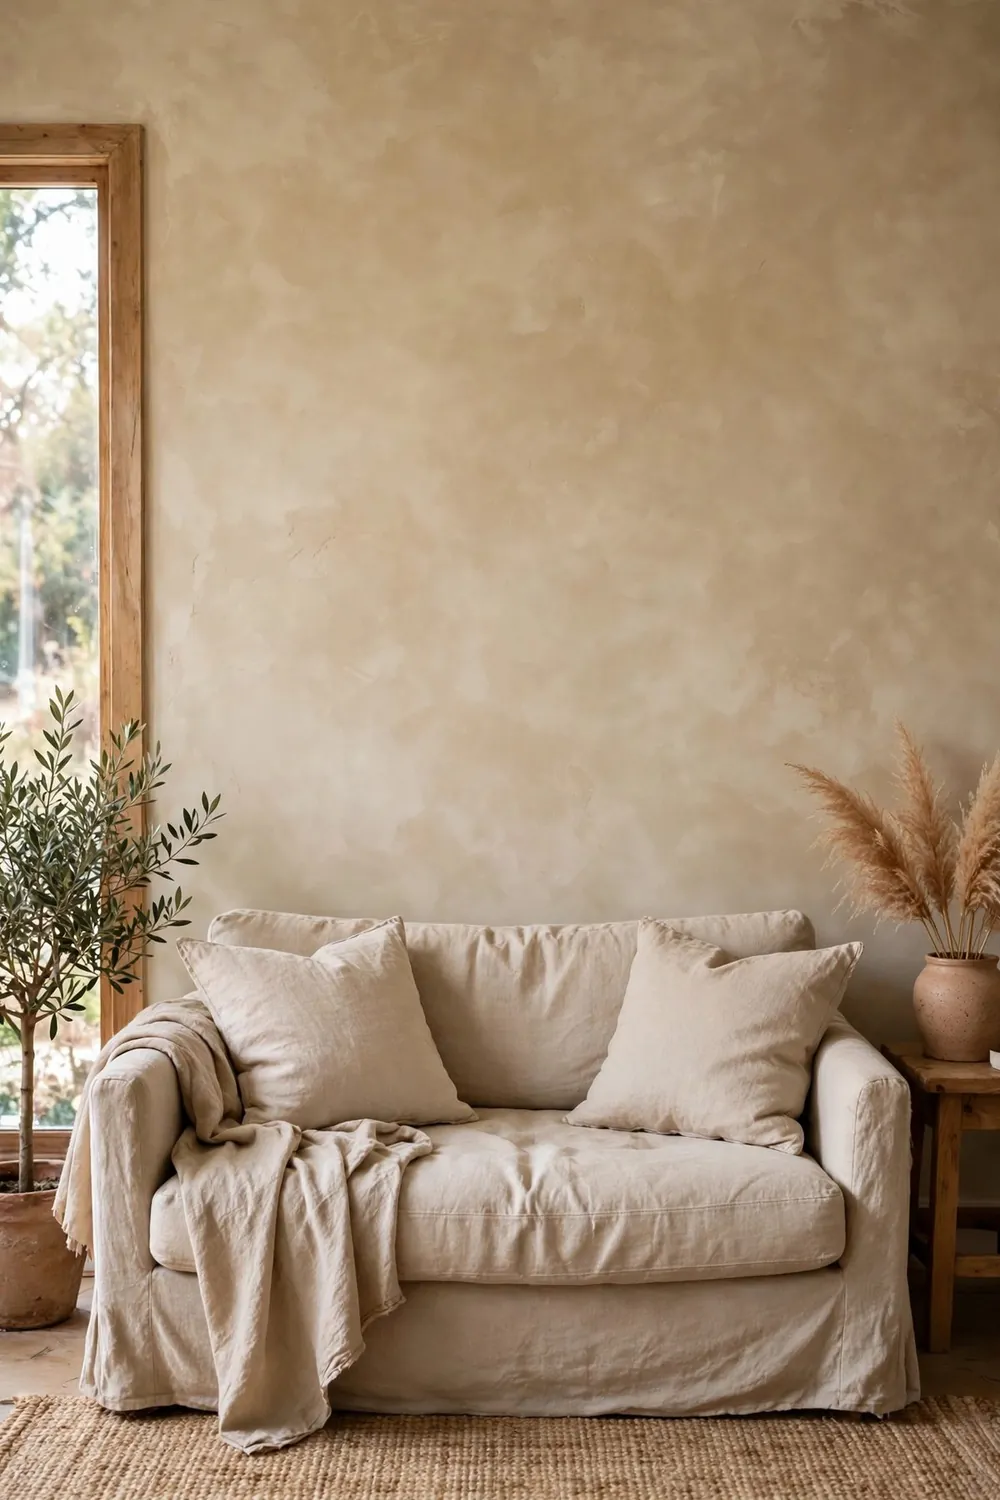
Limewash paint creates a soft, cloudy, old-world texture with nothing but a big brush and crisscross strokes — imperfections are literally the point, which makes it the most forgiving paint project in existence. One accent wall behind a bed or sofa is enough.
If limewash feels like a leap, a simple color-wash with watered-down paint gives a gentler version of the same softness. Budget: $30–$60 for the feature wall. Your room will look like a boutique hotel in the best way.
No-Tool & Rental-Friendly Upgrades
No drill, no landlord drama, no problem. These projects transform a room with adhesives, fabric, and clever swaps.
4. Add a Peel-and-Stick Backsplash
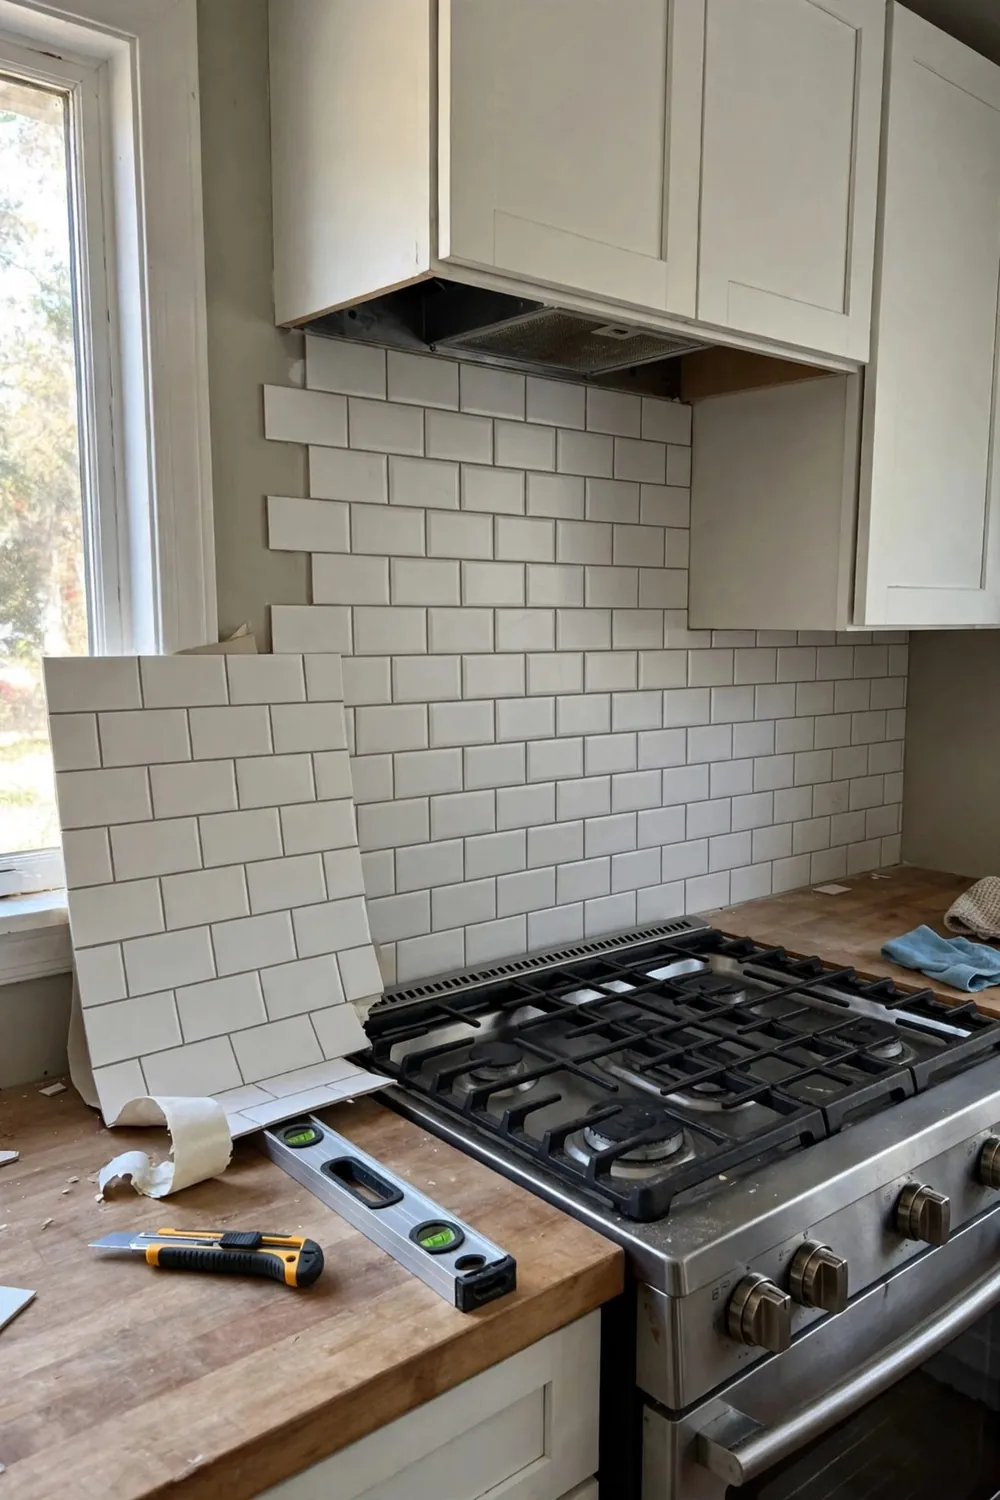
Modern peel-and-stick tiles are waterproof, heat-resistant near stoves (check your product’s rating), and genuinely convincing. Measure carefully, start from the most visible corner, and use a utility knife and straight edge for cuts. A kitchen or bathroom can gain a whole backsplash in an afternoon.
Renters: it peels off at move-out with a hairdryer’s warmth. Budget: $40–$90 depending on area. The before-and-after difference on this one is honestly shocking.
5. Upgrade Lighting With Plug-In Sconces
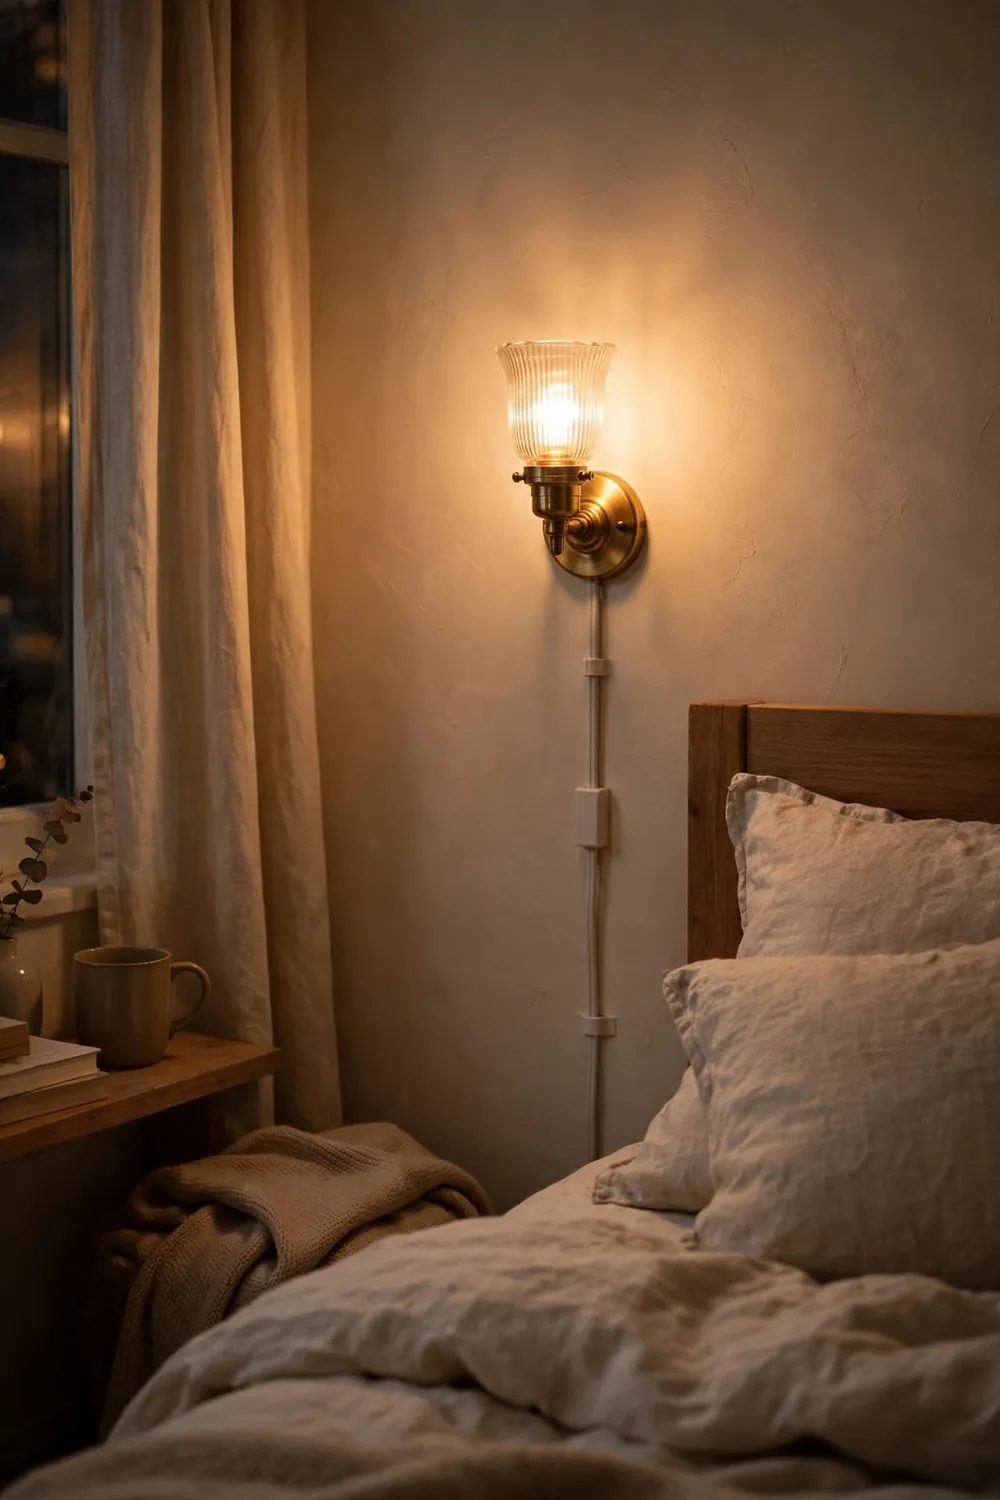
Running new wiring is not a beginner project, but you do not need it: plug-in wall sconces mount with two screws (or heavy-duty strips) and the cord can be hidden with a paintable cord cover. A pair flanking a bed, mirror, or sofa gives any room that layered, hotel-like light.
Warm bulbs, always. Budget: $35–$70 for a pair. This is the project that makes a rental feel owned.
6. Make No-Sew Curtains From Drop Cloths or Fabric
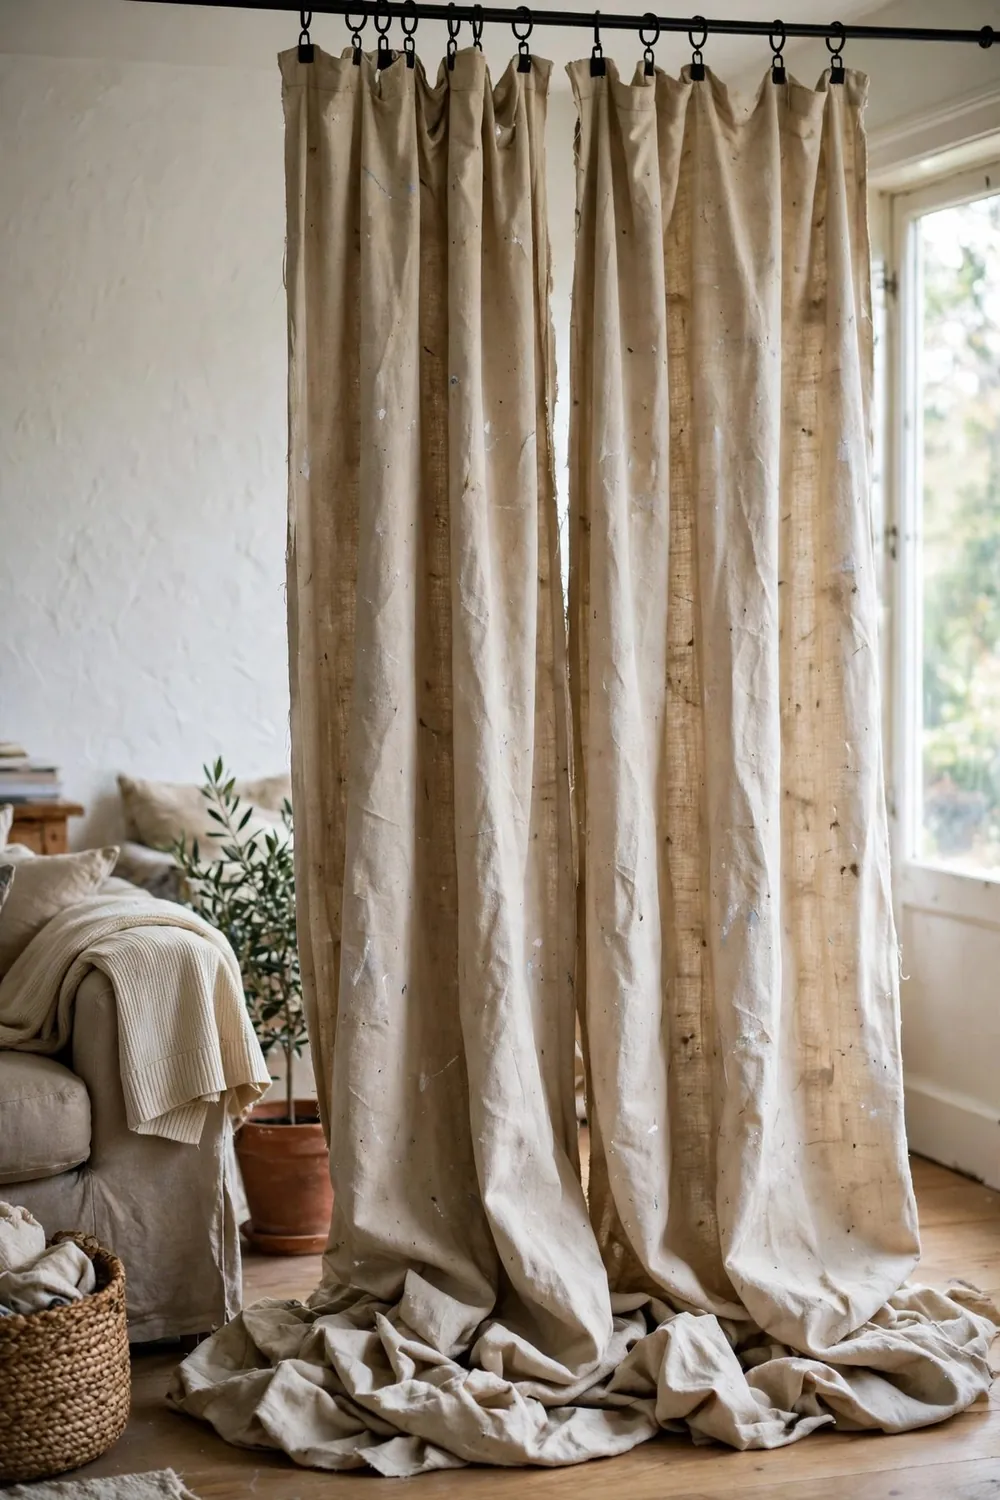
Canvas painter’s drop cloths are a decorator secret: cheap, wide, neutral, and they hang like linen. Wash and iron them, fold the top edge over a clip ring, and hang. No sewing, and a tall pair of curtains makes ceilings look higher instantly.
The same trick works with any fabric you love — clip rings do not care what they hold. Budget: $15–$30 per window. Hang them high and wide for the full effect.
Weekend Builds With Basic Tools
Ready for a saw and a drill? These projects look like carpentry and behave like crafts — simple cuts, forgiving designs.
7. Install a Board and Batten Wall
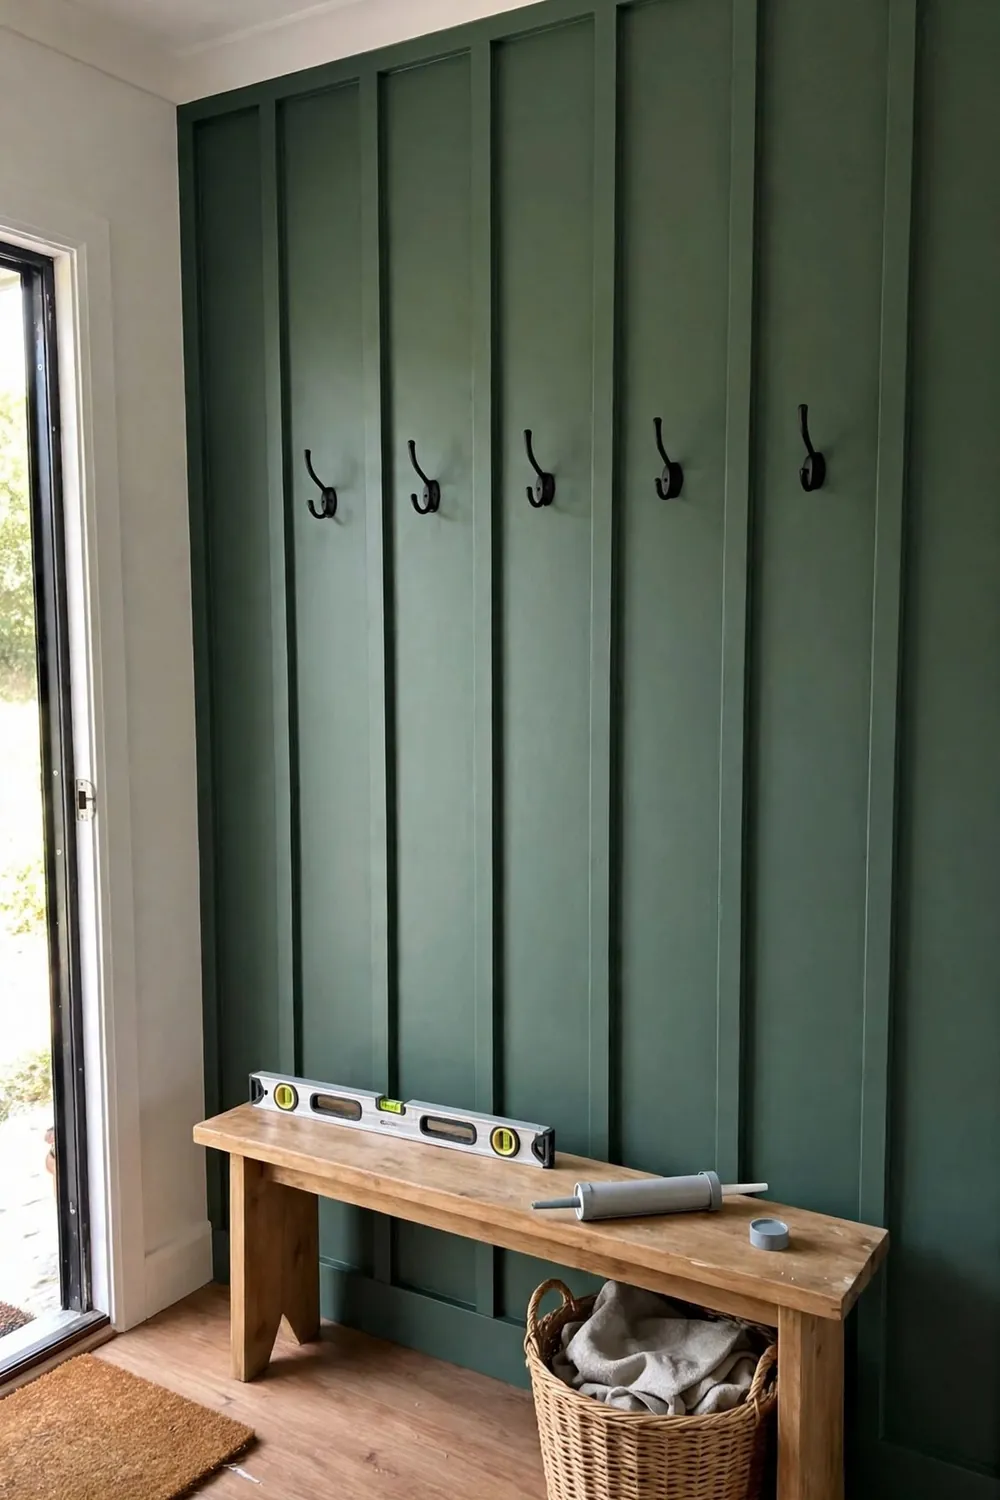
Board and batten is the highest “wow” per dollar in all of DIY. Vertical and horizontal boards (pre-primed MDF is cheapest and easiest) are nailed and glued to a wall in a grid, caulked, and painted one color. The result looks like expensive custom millwork.
An entryway wall with hooks added becomes a mudroom; a bedroom wall behind the bed becomes a headboard feature. Many hardware stores will cut boards to your measurements for free — bring a plan. Budget: $75–$150 per wall. Time: one full day.
8. Build a Simple Floating Shelf (or Three)
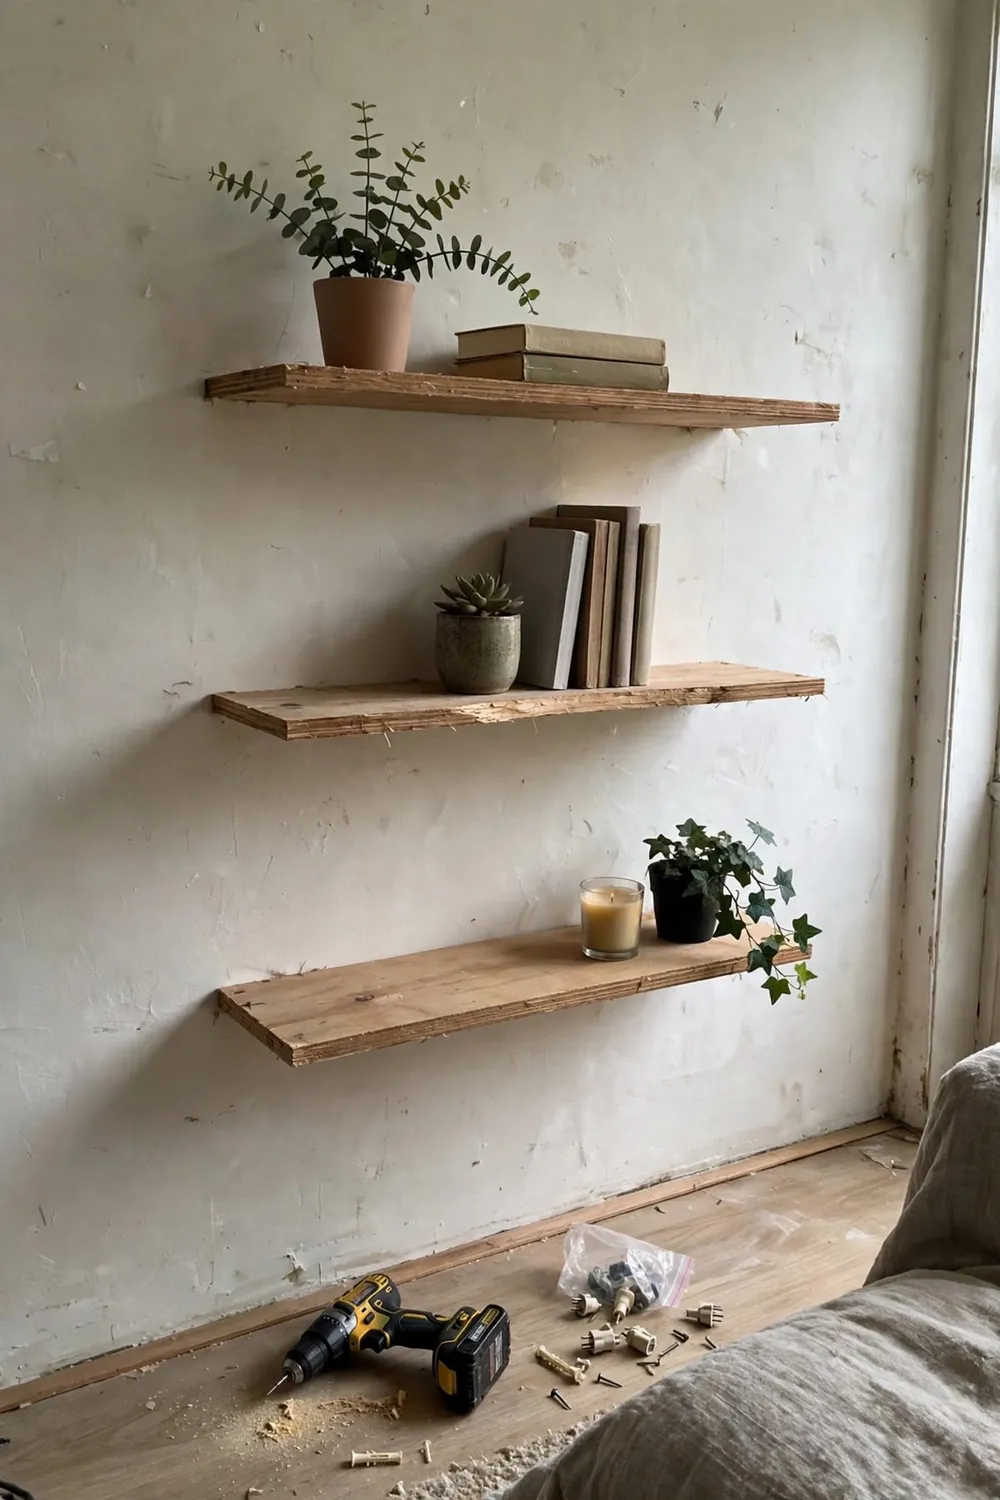
A thick floating shelf is two boards, a hidden bracket kit, and an afternoon. Style it with plants, books, and baskets and it does the work of a whole furniture piece while taking zero floor space.
Bathrooms, kitchens, and the wall above a desk are the happiest homes for floating shelves. Budget: $25–$50 per shelf including brackets. Keep loads light and find the studs — that is the whole secret.
9. Frame a Builder-Grade Mirror
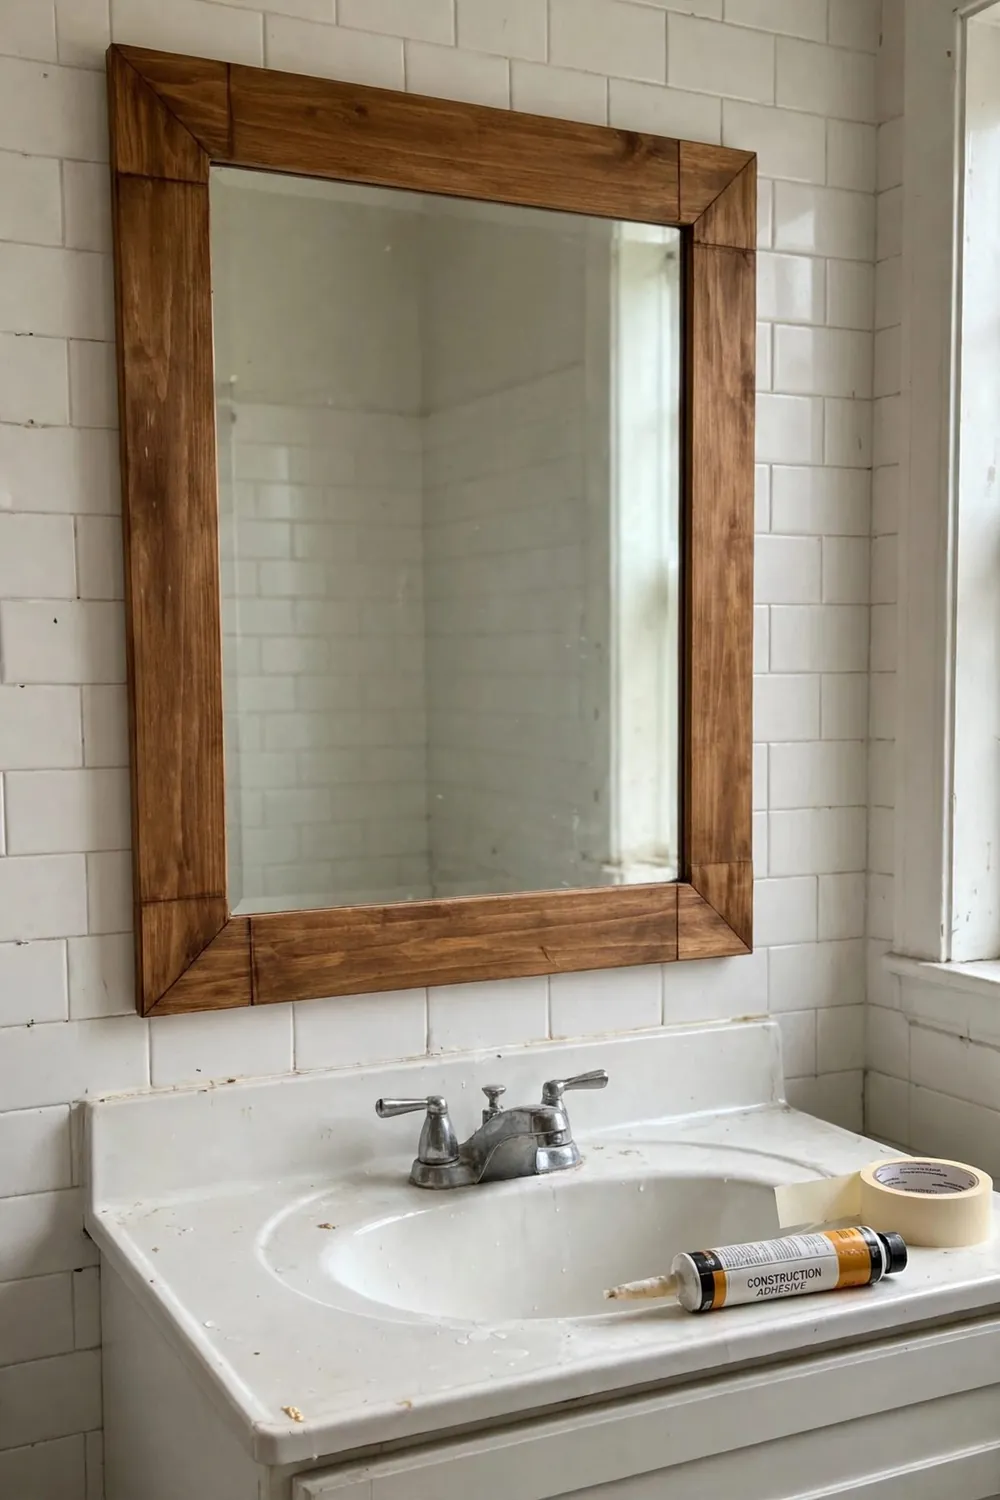
Those huge plain bathroom mirrors glued to the wall can look custom with a simple wood frame stuck right over the glass. Measure the mirror, cut four pieces of trim or lightweight board at 45-degree angles (or square corners for a simpler look), paint or stain, and attach with construction adhesive.
Instant architecture for the room you look at most. Budget: $20–$40. Works in rentals too if you use removable adhesive strips rated for the weight.
10. Create a Gallery Wall From Thrifted Frames
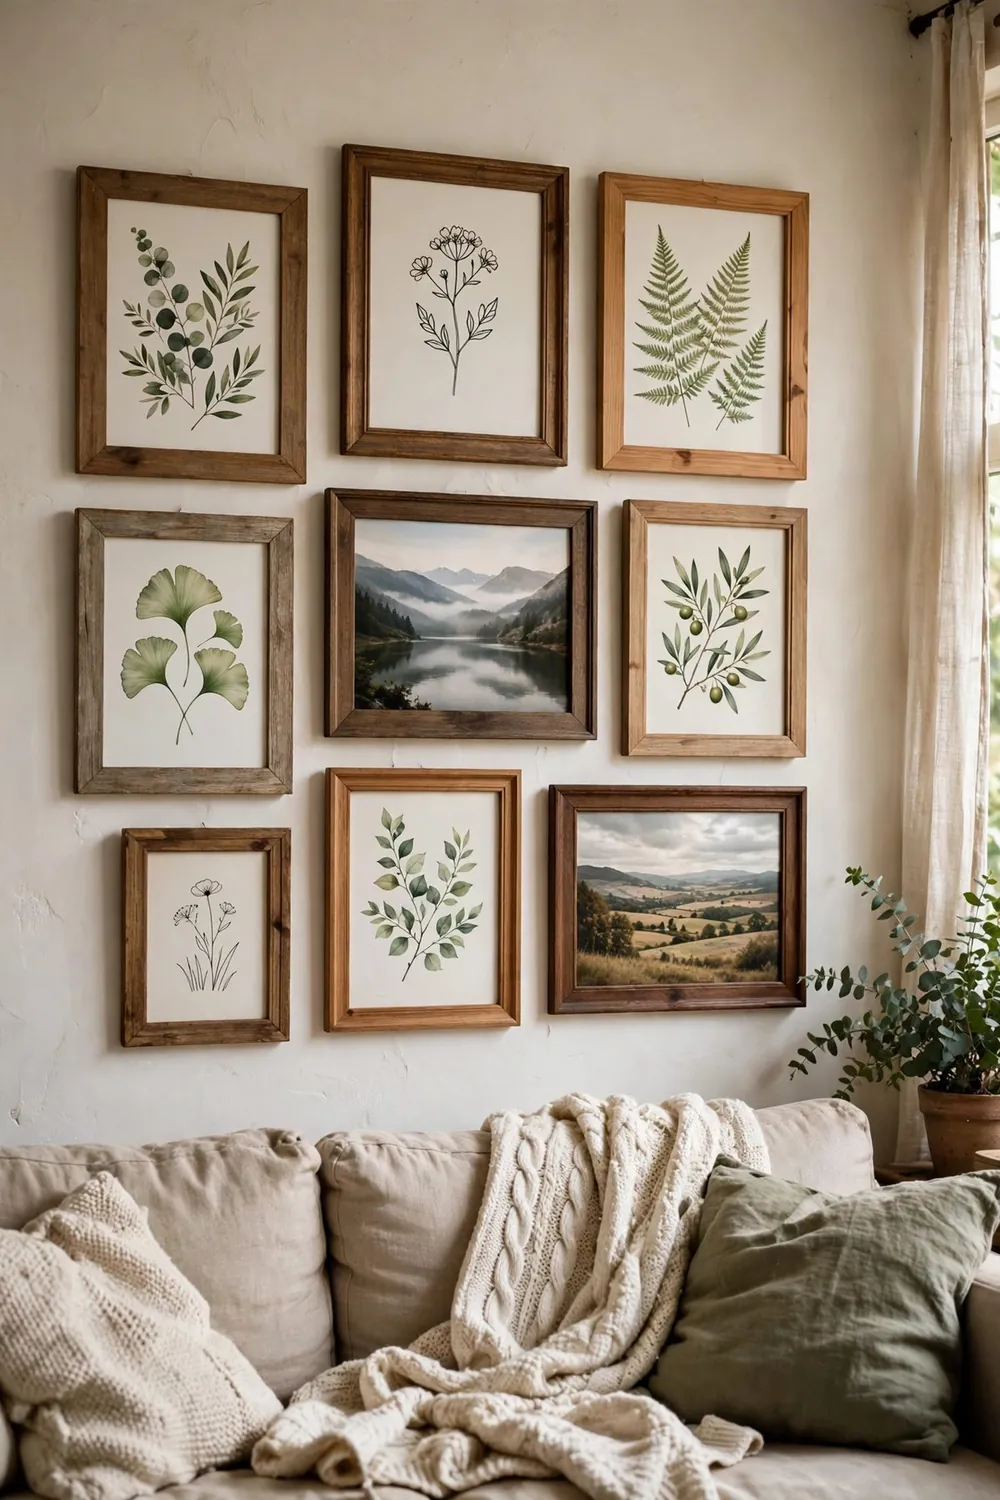
Collect frames from thrift stores over a few weeks — mismatched is fine. Unify them with one spray-paint color, or keep mixed woods for a collected look. Fill them with art prints, botanical pages from old books, family photos, or your own simple line drawings.
Lay the arrangement on the floor first, photograph it, then hang from the center out. Budget: $20–$60 total. A gallery wall turns a blank rental wall into the most personal spot in the house.
More Weekend Projects to Try Next
Still collecting ideas? These final additions round out the list — each one tested against the same rule as everything above: it has to earn its place in a real home, on a real budget.
11. Build a Floating Shelf From a Single Board
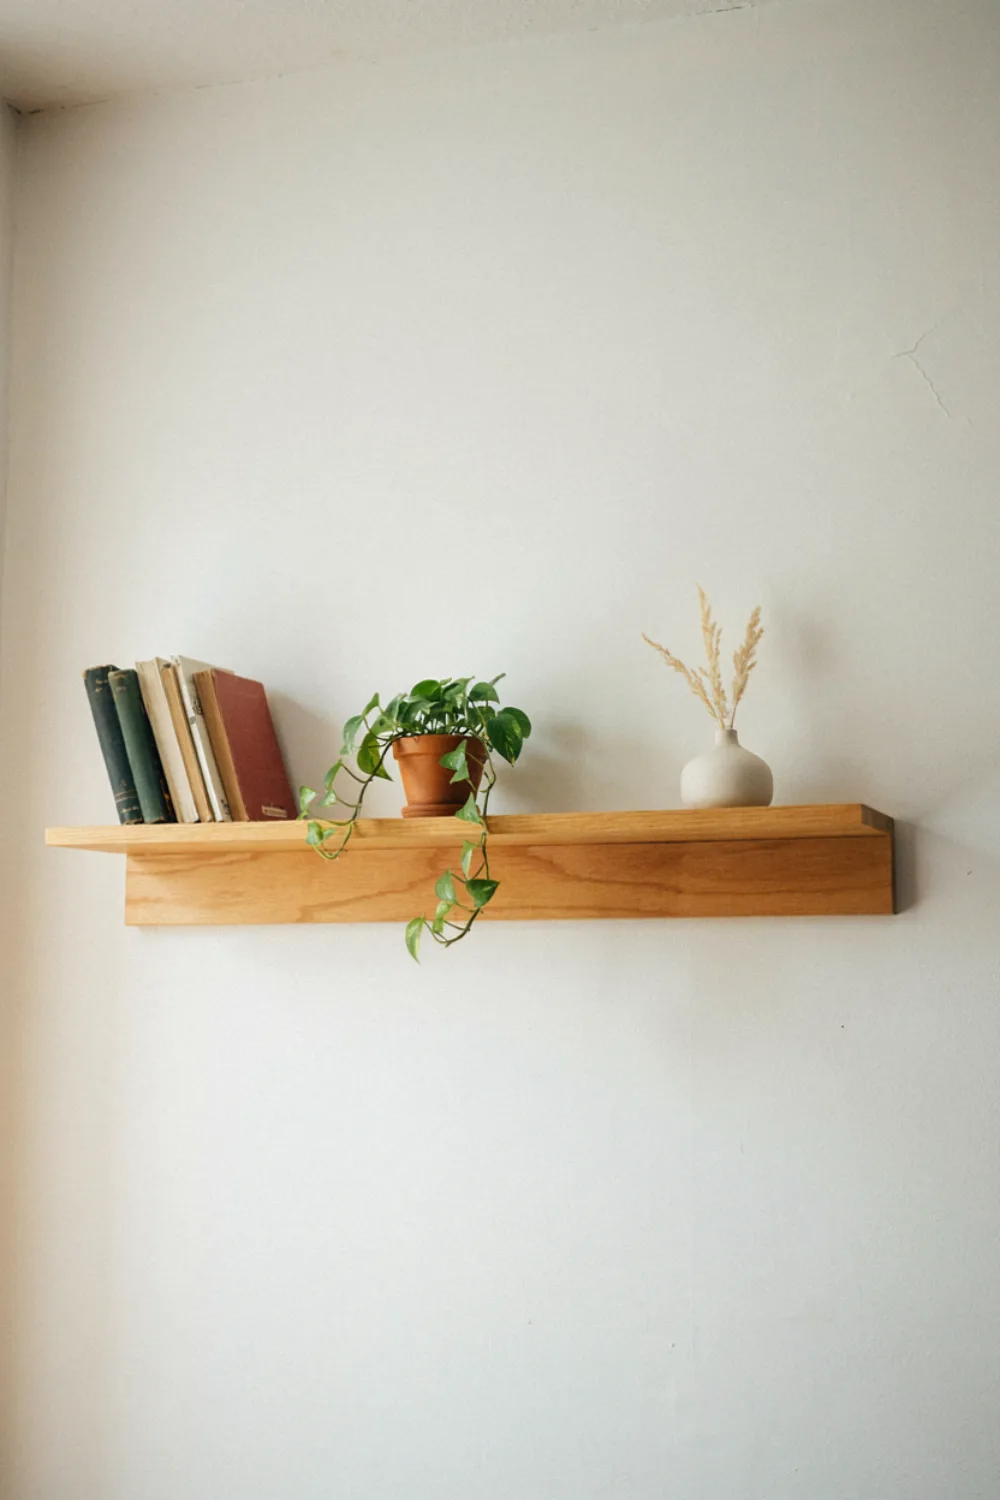
One pine board, two hidden brackets, and a level are all it takes to add a floating shelf that looks built-in. Cut the board to length (most hardware stores cut free), sand and stain it the night before, and fix the brackets into studs or proper wall anchors.
Time: about an hour plus drying. Style it sparsely — a plant, a stack of books, one framed photo — and a blank wall becomes the room’s hardest-working corner.
12. Make No-Sew Cushion Covers From Tea Towels
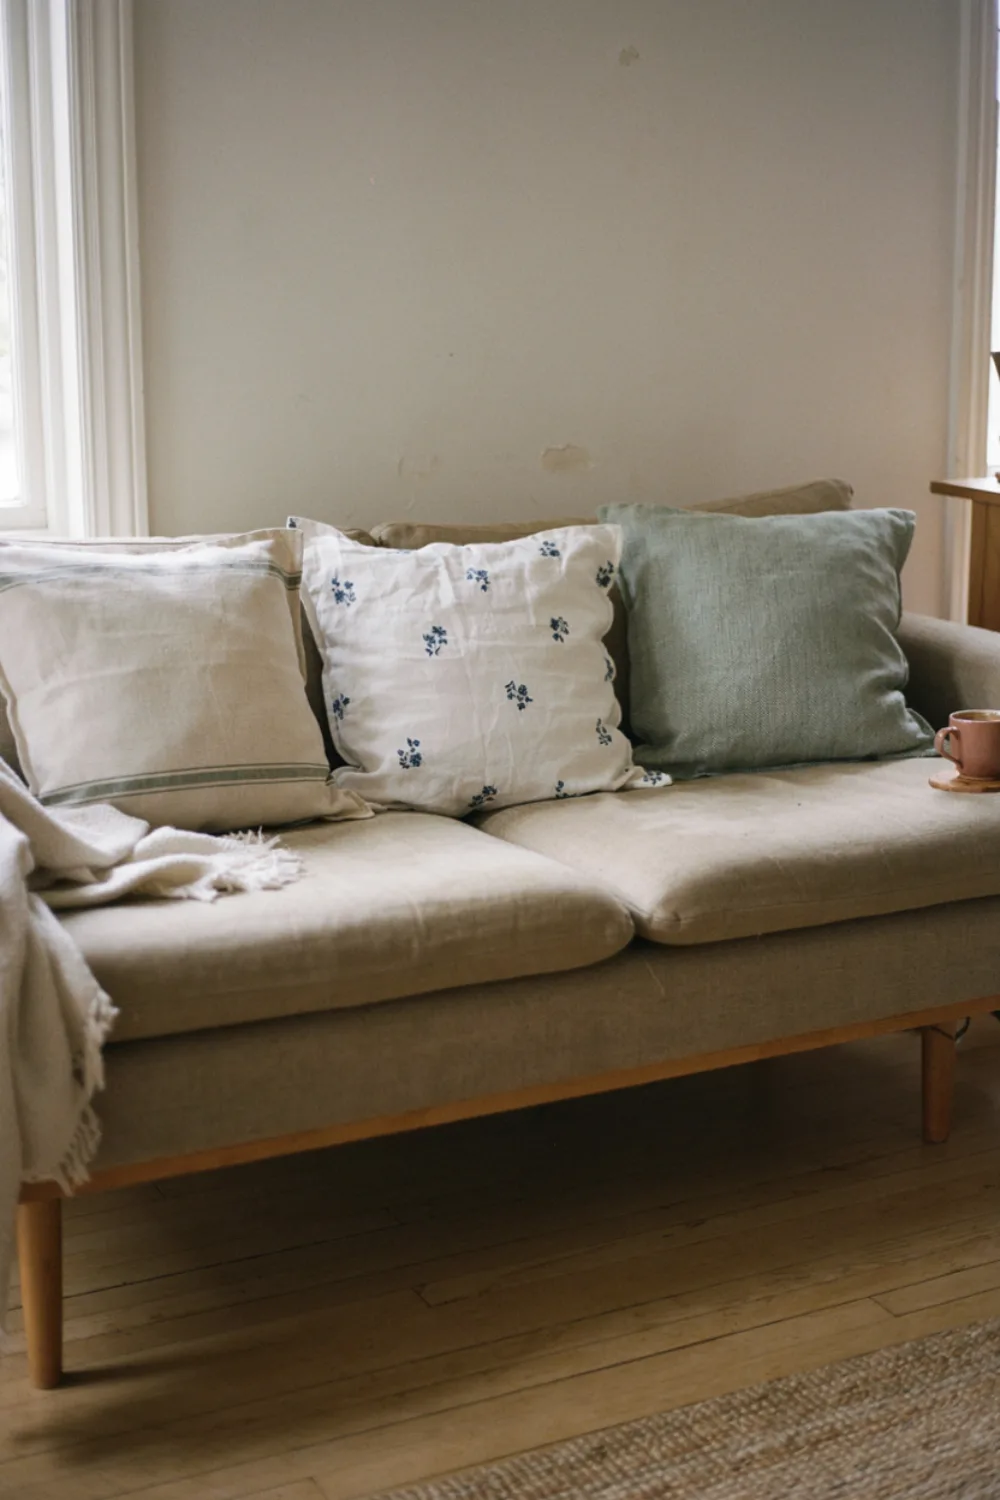
Two large linen tea towels, fabric glue or iron-on hemming tape, and fifteen minutes give you cushion covers with a genuinely boutique look. Lay the cushion pad between the towels, bond three sides, insert the pad, and bond the last side with a fold-over flap.
Choose towels with a stripe or check you love — the woven pattern does the decorating for you, and when you tire of them, the ‘covers’ go back to kitchen duty.
13. Frame Fabric and Wallpaper Samples as Art
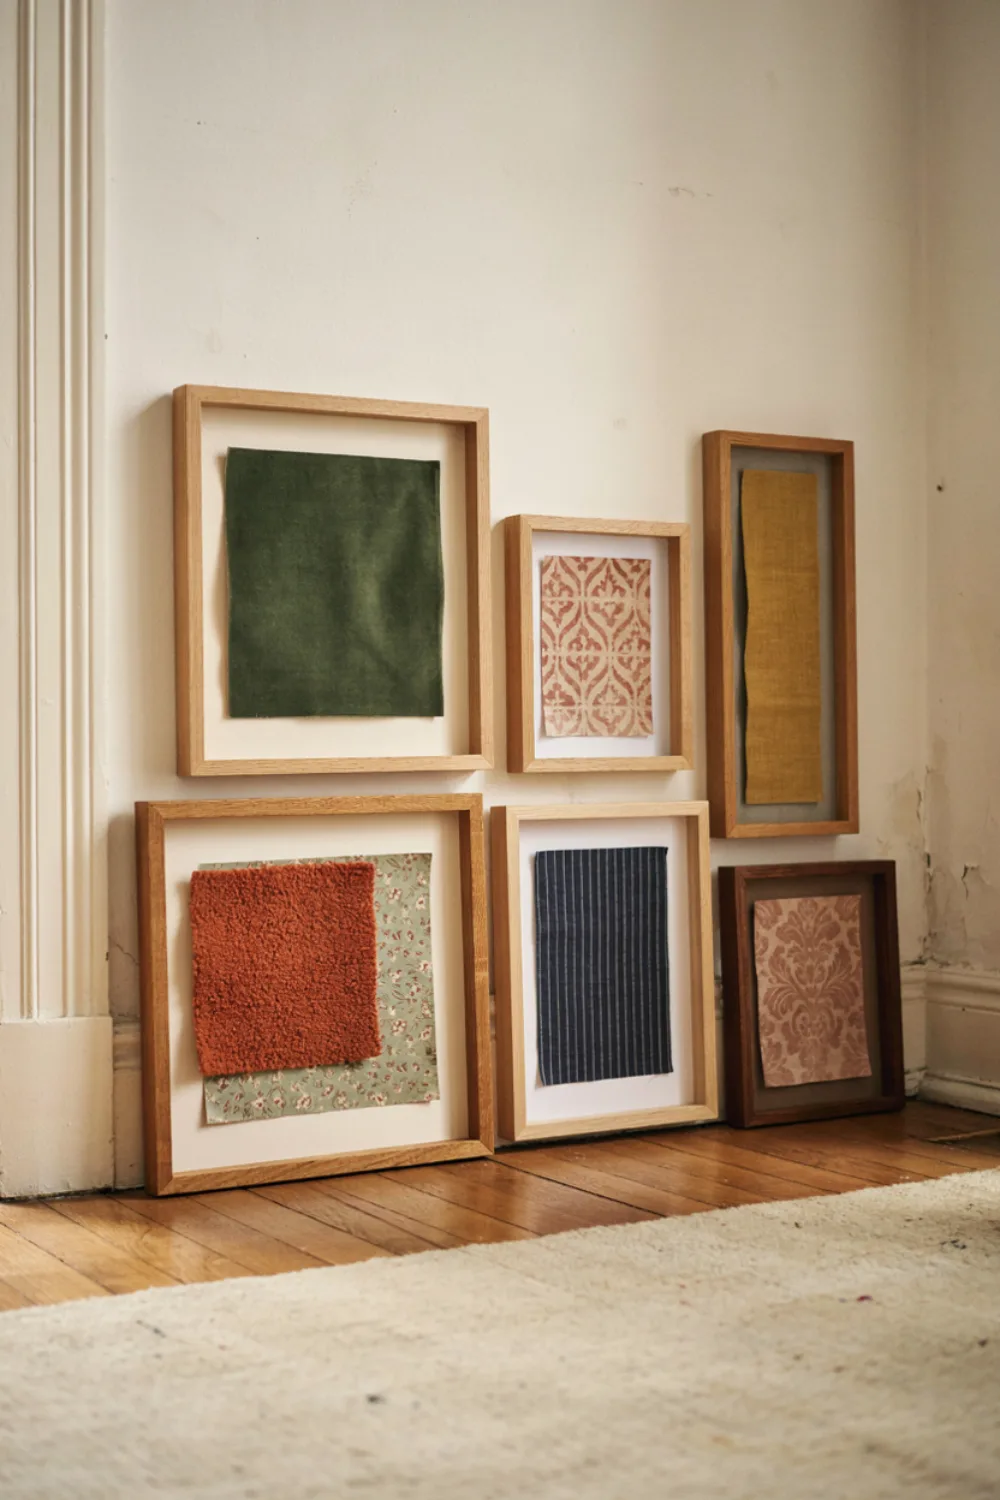
A beautiful fabric offcut or wallpaper sample in a simple frame is real art at a fraction of the price — textile patterns have more depth than most prints. Stretch fabric over the frame’s backing board, staple it taut at the back, and hang in pairs or grids of four.
Sample books and remnant bins are the budget source here: end-of-roll pieces in designer patterns often cost less than a coffee, and nobody will ever guess.
14. Paint a Checkerboard on a Plain Runner Rug
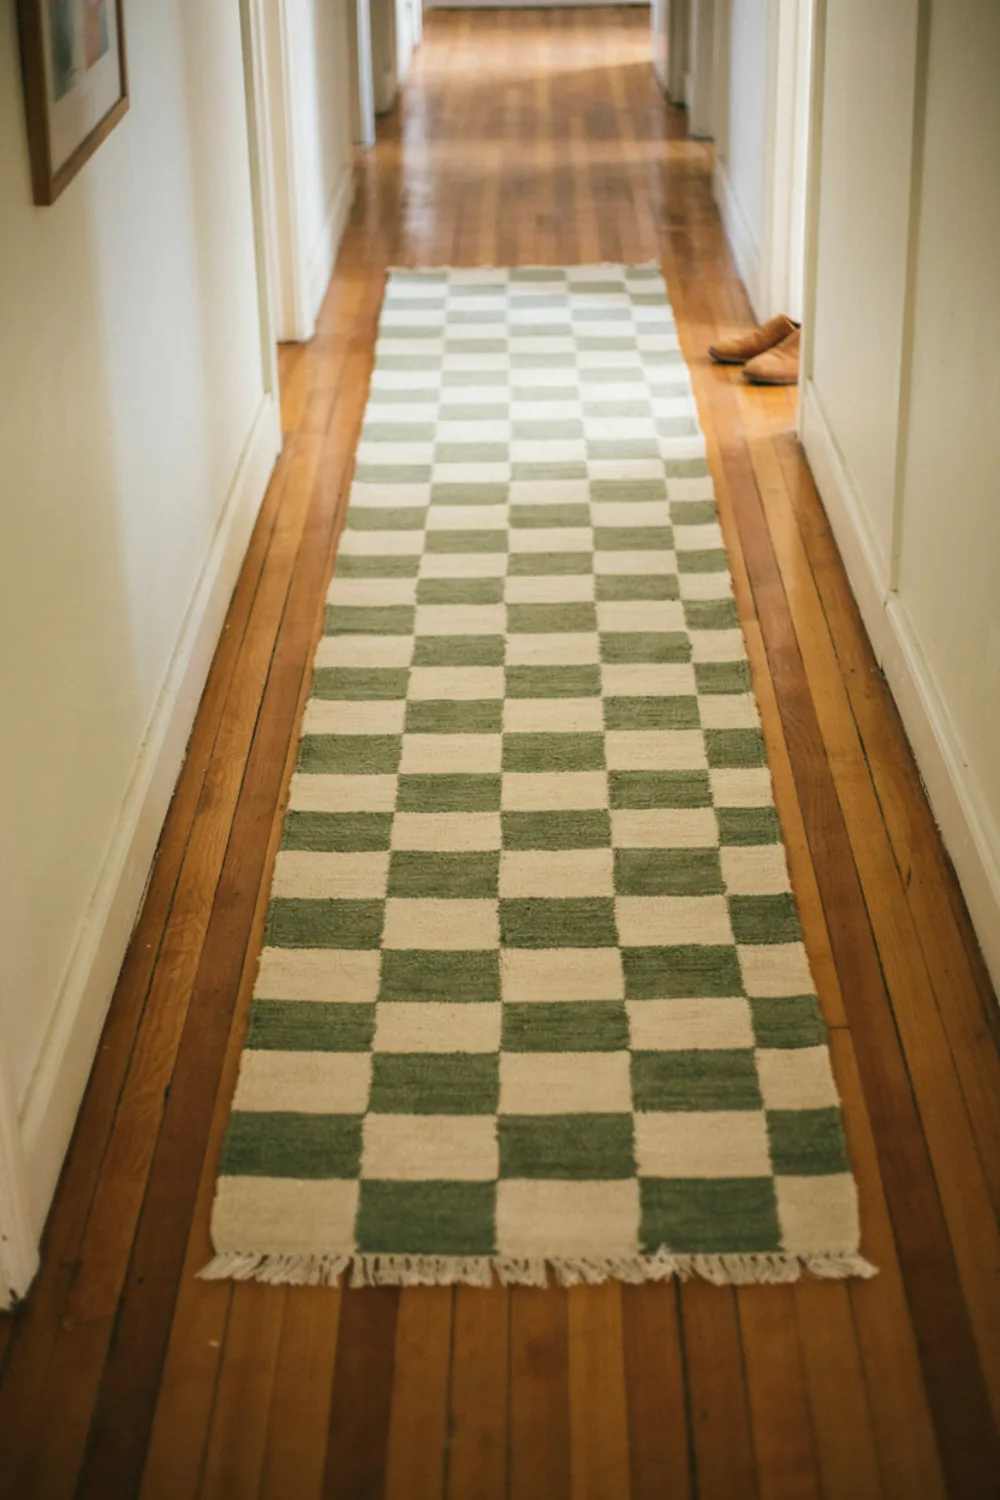
A plain flat-weave runner plus painter’s tape and fabric paint becomes a classic checkerboard rug in one afternoon. Tape a grid, sponge the paint on thinly (two light coats beat one thick one), and let it dry fully before walking on it.
Keep the contrast soft — warm white and clay, or cream and sage — and the result looks woven rather than painted. It is the easiest big-pattern upgrade a hallway or kitchen can get.
15. Build a Picture Ledge for Rotating Art
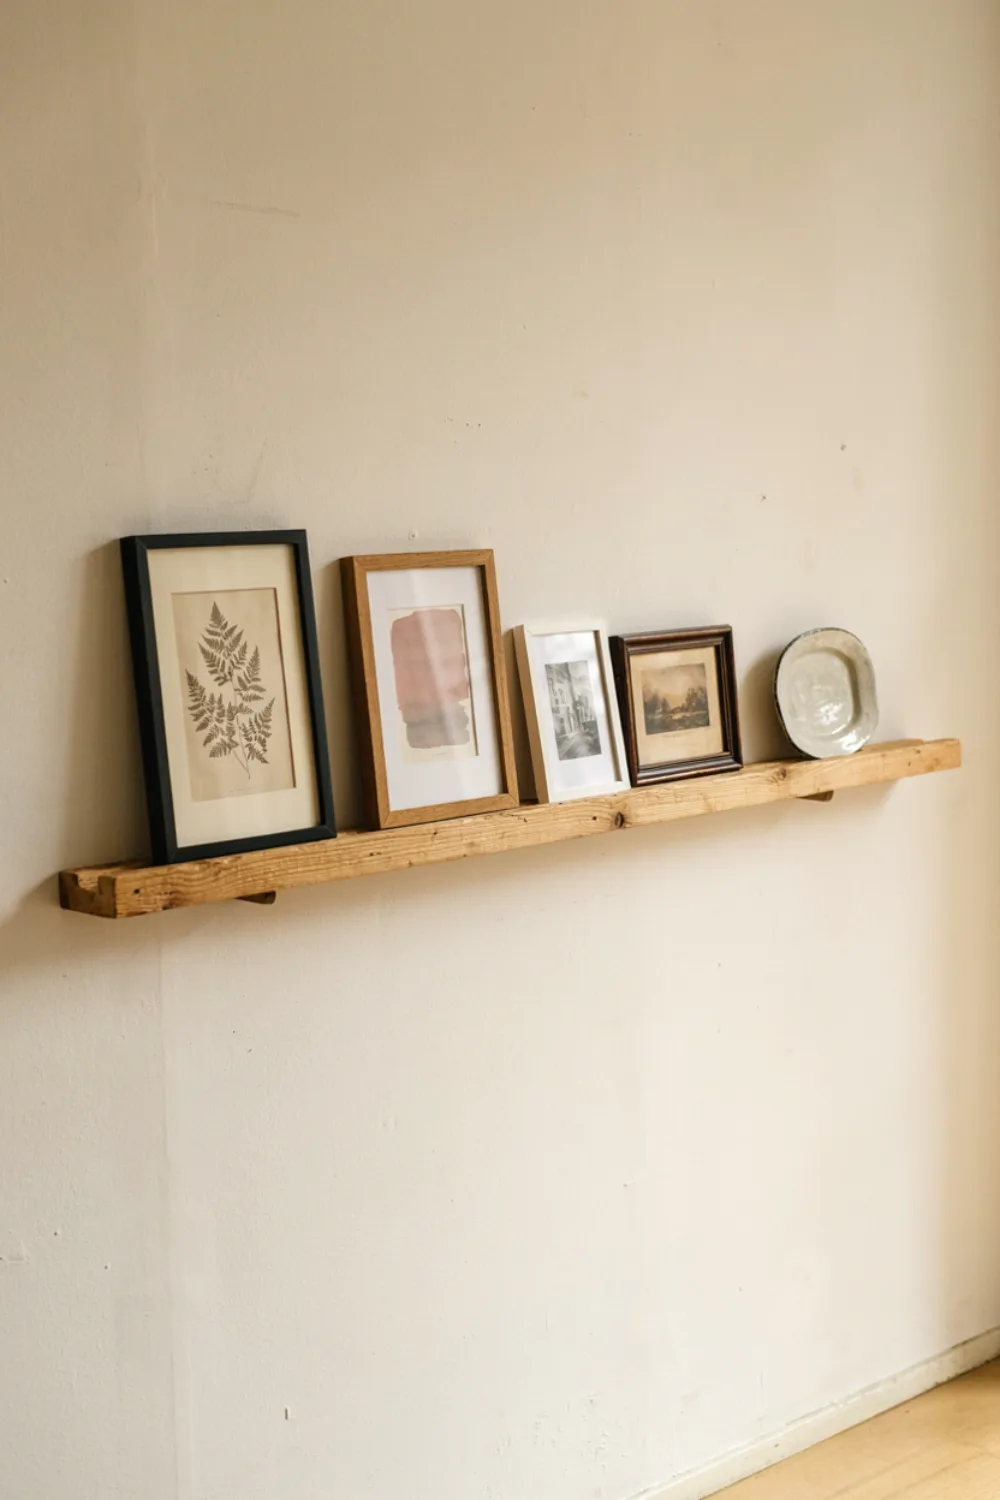
Two lengths of timber — one flat for the base, one slim strip for the lip — screwed and glued into an L shape make a picture ledge that lets you swap art without new holes. Paint it the wall color for a gallery feel or stain it for warmth.
Time: about ninety minutes. Lean frames, postcards, and small plants along it, and restyle it seasonally — it is the lowest-commitment gallery wall there is.
16. Turn Glass Jars Into Painted Vases
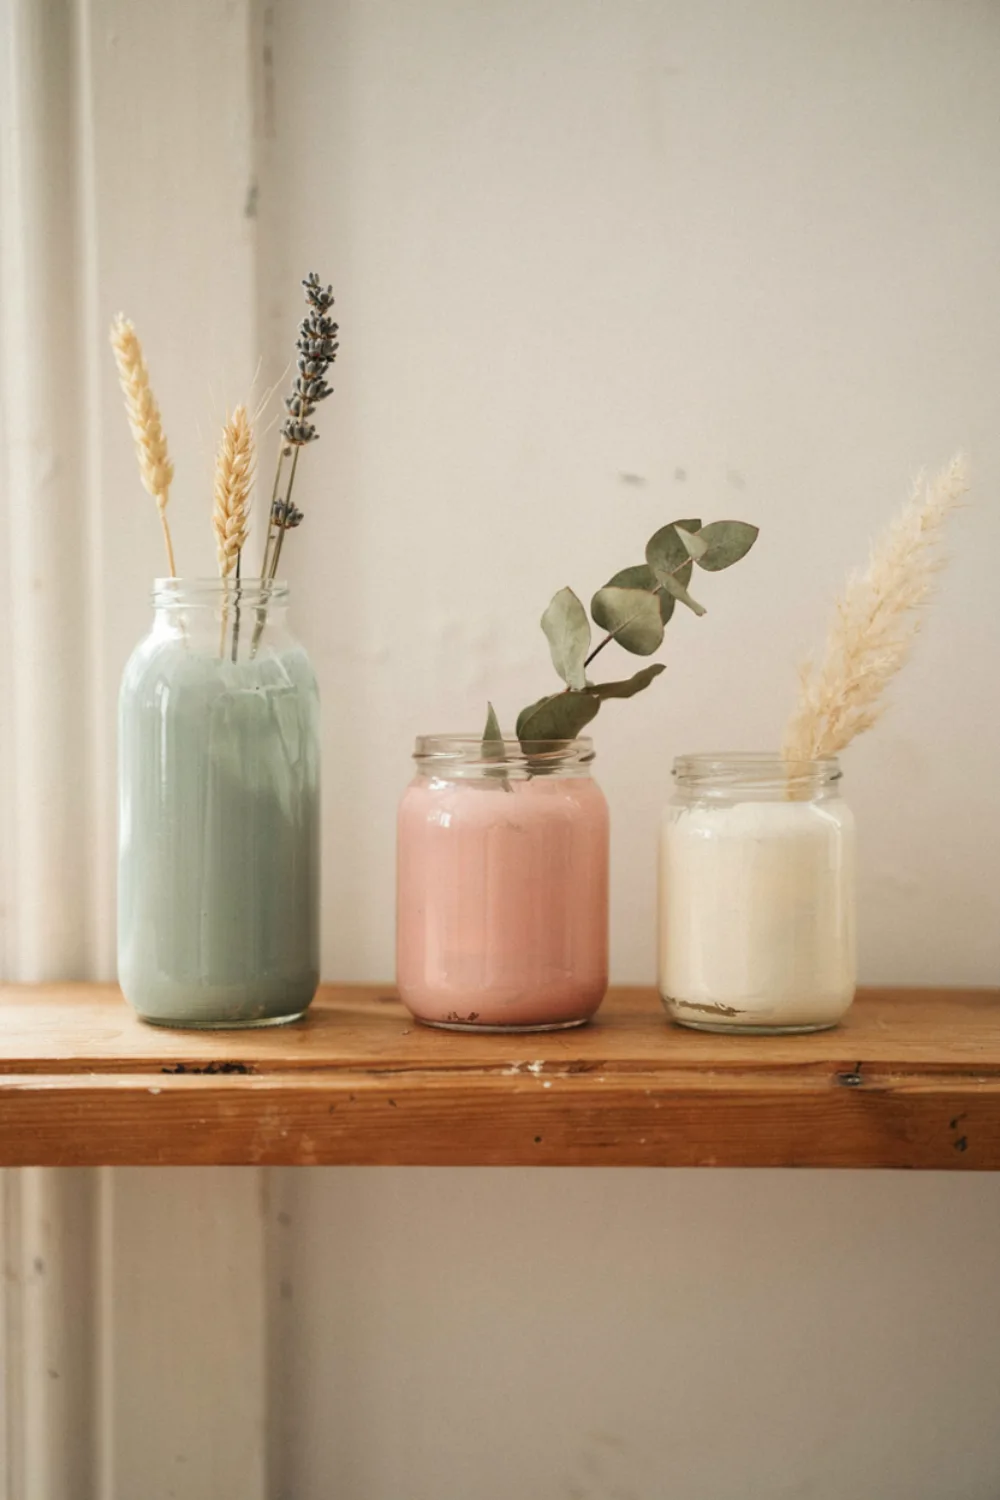
Save three glass jars in different heights, wash off the labels with warm soapy water, and paint the insides with a swirl of diluted chalk paint. Pour, rotate until coated, drain upside down, and you have matte ceramic-look vases for dried stems.
Group them in threes on a tray. The inside-paint trick means the finish never chips from handling, and the whole project costs less than one shop-bought vase.
17. Stencil a Quiet Pattern Onto Plain Curtains
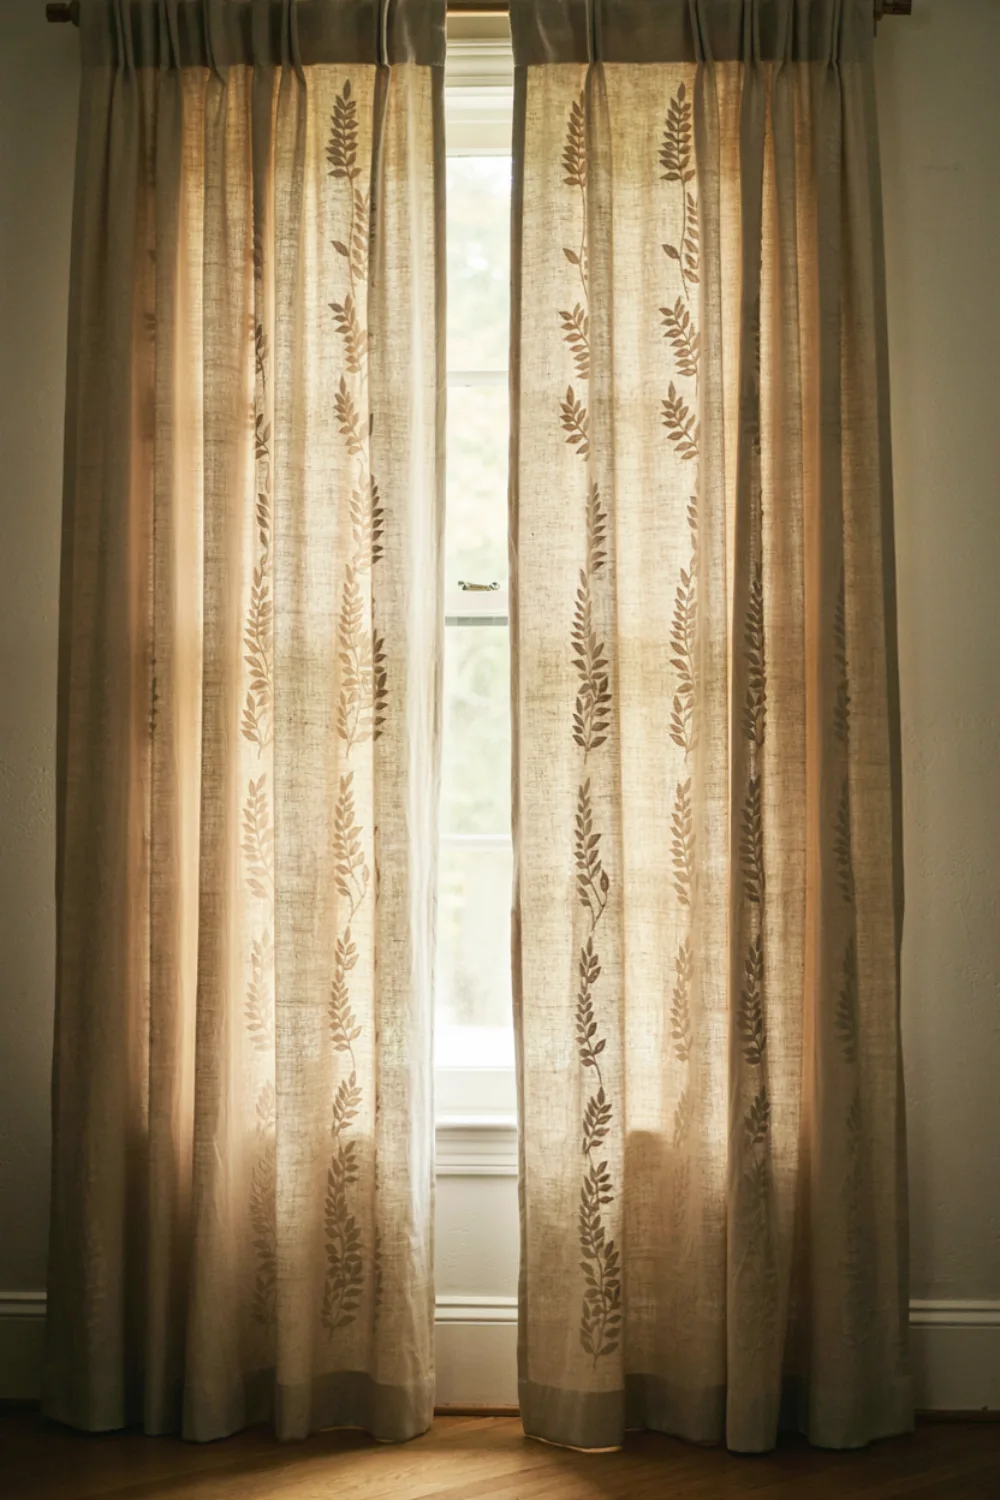
Plain curtains are a blank canvas: a simple stencil — a fern, a dot grid, a thin stripe — repeated in fabric paint a shade deeper than the cloth adds custom pattern for a few dollars. Work on a flat table, tape the stencil, and use a nearly dry brush to stop bleeding.
Practice on the hem first. A subtle, tonal pattern reads expensive and forgiving; high-contrast prints show every wobble, so keep your first project gentle.
18. Make a Rope-Wrapped Basket From a Cardboard Box
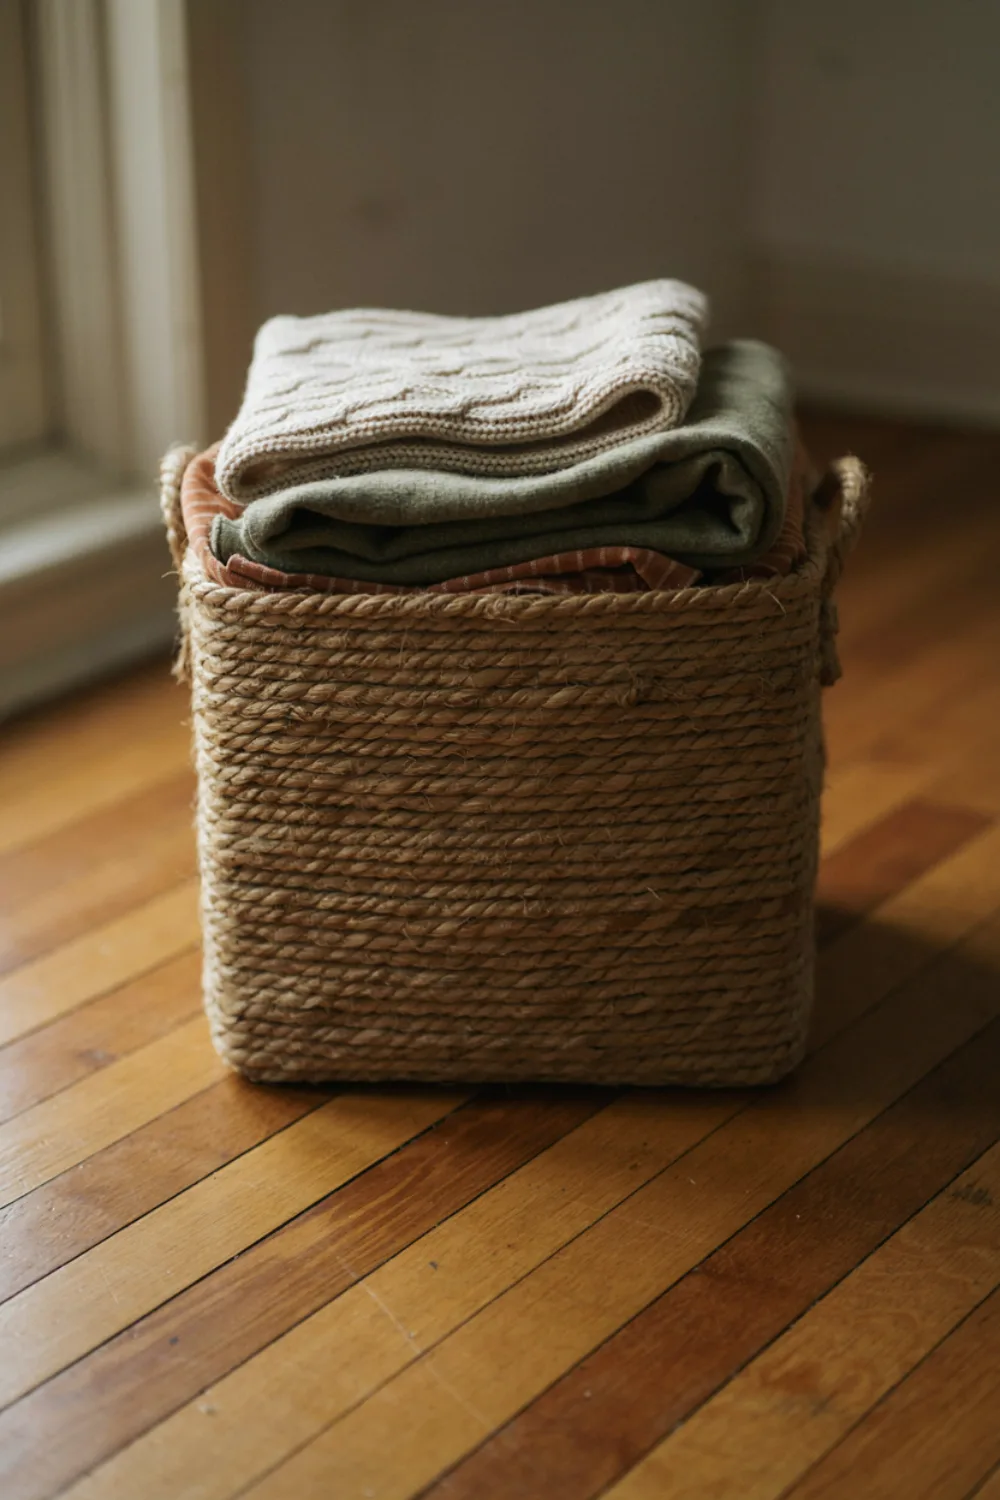
A sturdy cardboard box, a coil of jute rope, and a hot-glue gun become a woven-look storage basket that genuinely fools people. Glue the rope in a continuous spiral from the bottom up, line the inside with a pillowcase or fabric remnant, and fold the lining over the rim.
Cost: under $10. Use it for throws, toys, or the hallway shoe pile — beautiful hidden storage is the backbone of every calm room in this guide.
19. Line a Bookcase Back With Beadboard Wallpaper
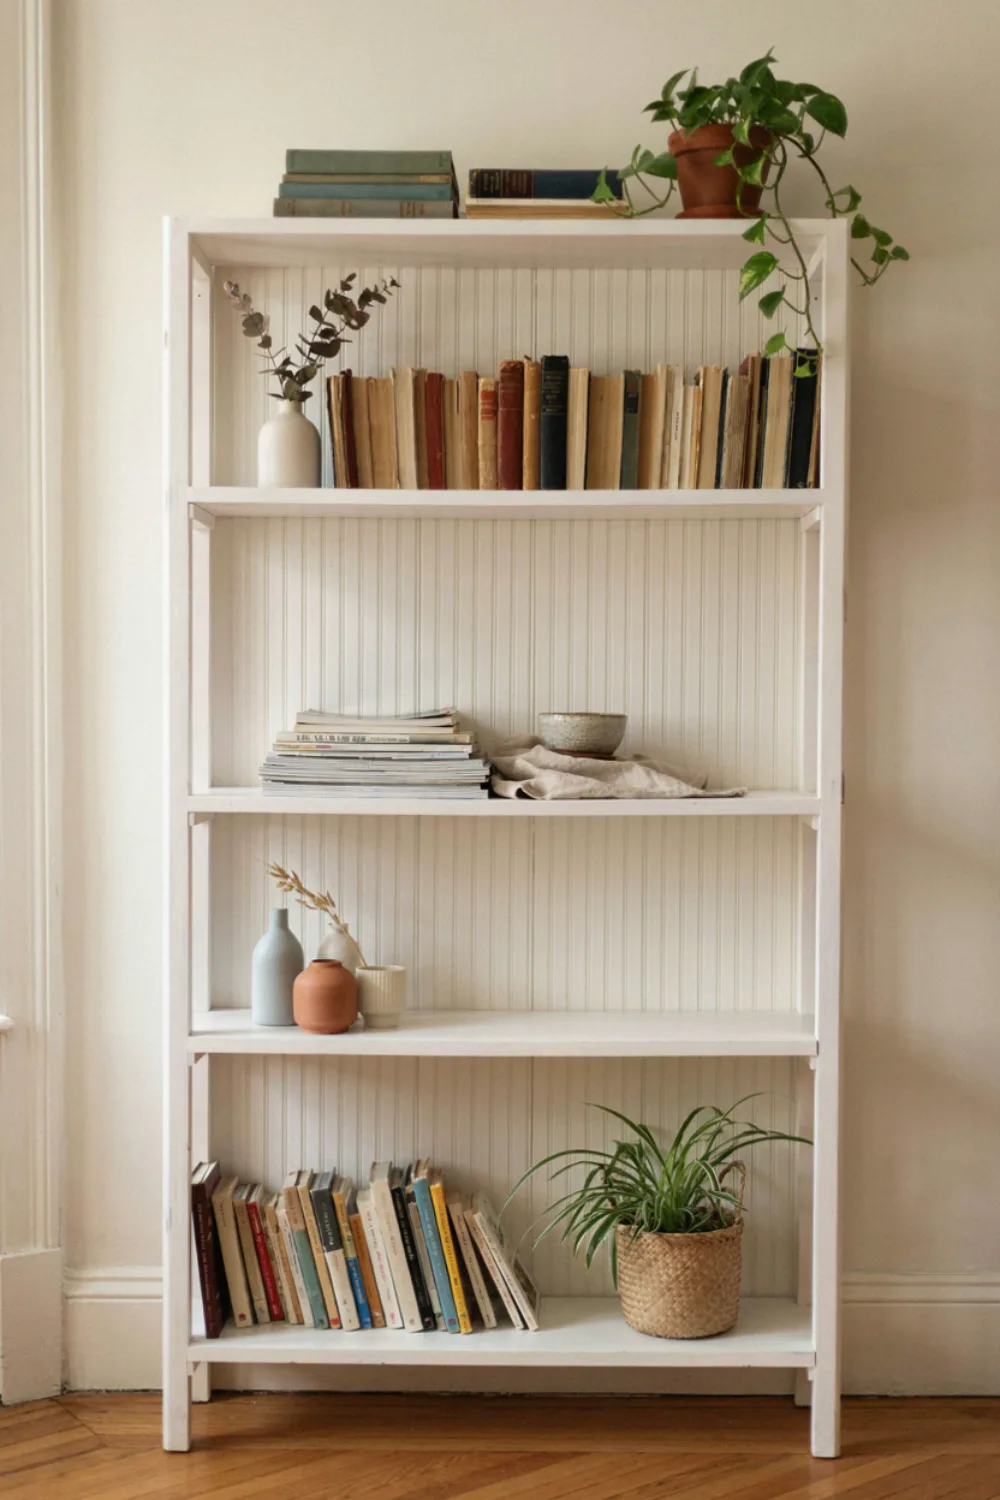
Peel-and-stick beadboard wallpaper on the back panel of a bookcase adds instant architecture and makes everything on the shelves look more valuable. Measure, cut with a sharp blade, and smooth from the center out to avoid bubbles.
Paint it the same color as the shelves for a built-in look, or one shade deeper for shadow and depth. It is fully removable, which makes it a favorite for renters and the commitment-shy.
20. Build a Slatted Headboard Over One Weekend
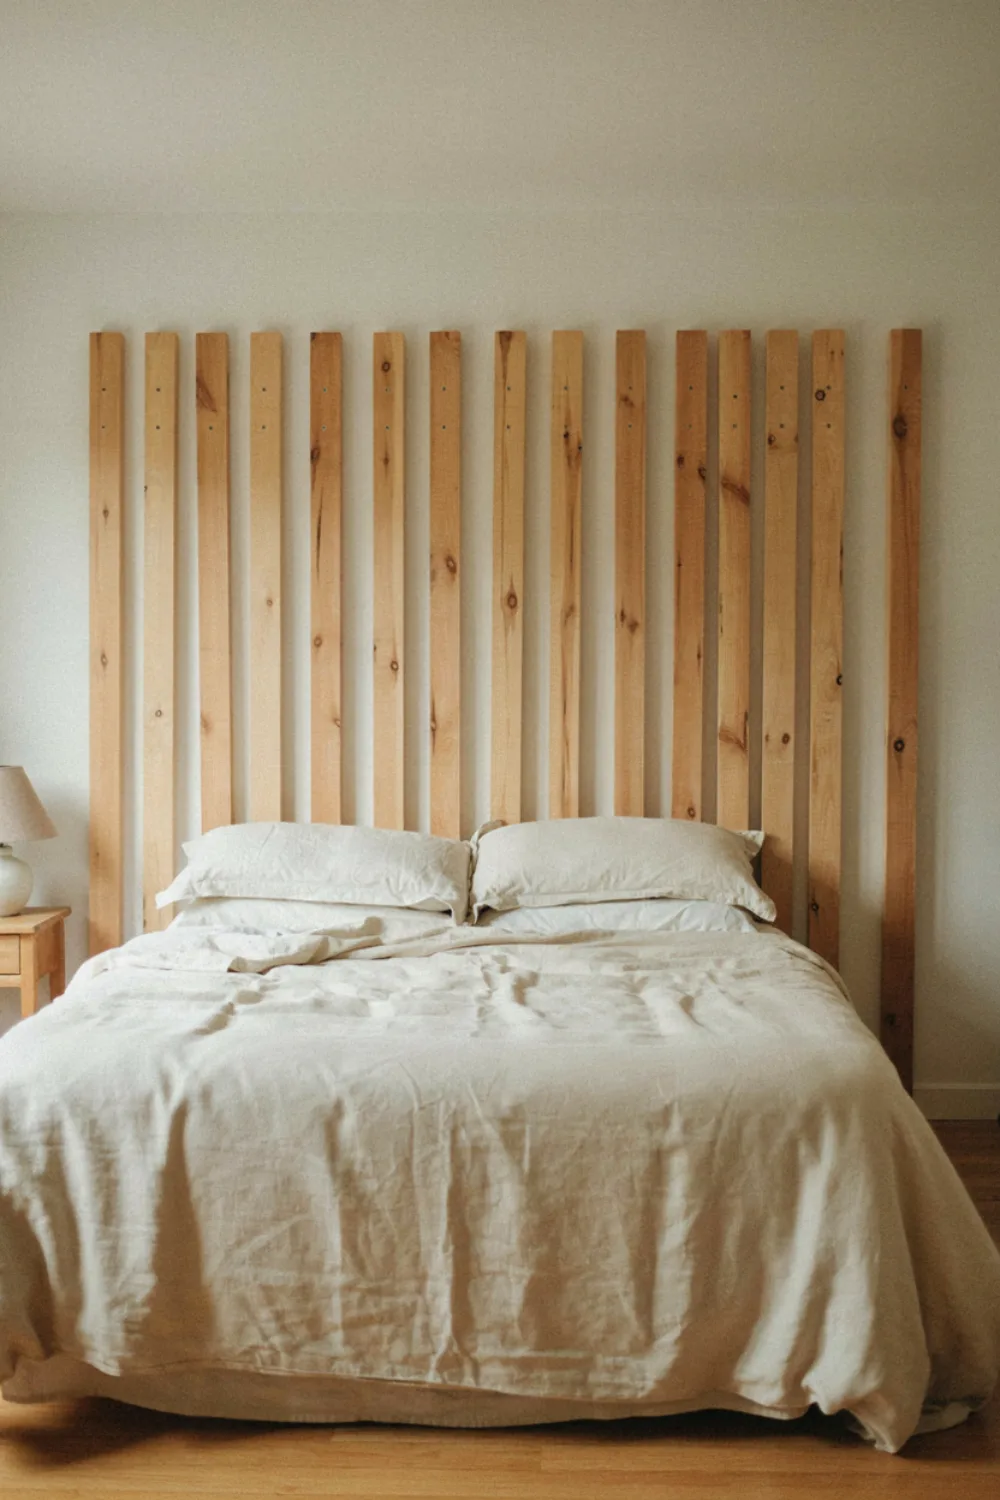
Vertical pine slats, spaced a finger’s width apart and fixed to two horizontal battens, make a warm modern headboard for the price of a takeaway dinner for four. Sand every slat, stain or leave natural, and hang the battens on the wall so the headboard floats.
Measure your bed width and add 10 cm each side. Of all the projects in this list, this one changes a room the most per dollar — the bed wall becomes the room.
Before You Start: Skills, Safety & Setup
A little preparation separates the satisfying weekend project from the cautionary tale.
The five skills that cover everything. Measuring accurately, cutting straight (or getting the store to cut), drilling a level hole, painting in thin coats, and caulking a clean line. Every project in this guide is a combination of those five, and each one you do teaches two of them. If you learn nothing else, learn measuring: most DIY heartbreak is a measurement wearing a disguise.
Safety, briefly and seriously. Eye protection when cutting or sanding, a mask when sanding or using spray products, gloves for stain and stripper, and the ladder rules (three points of contact, never the top step). Turn off power at the breaker for anything near wiring, even “just” moving a sconce. Know where your studs are before anything heavy goes on a wall, and never hang weight from drywall alone. None of this is optional, and all of it becomes habit by project two.
Set up like a person who finishes. Lay out every tool and material before you begin, protect the floor properly, keep a trash bag and a damp rag within reach, and photograph the “before” from the doorway. Mid-project supply runs are where Saturdays go to die. A small ritual — coffee, playlist, everything staged — turns a chore into the hobby people fall in love with.
When a Project Goes Wrong (It Will, and It Is Fine)
The paint color is wrong. Live with it for 48 hours in different light before panicking — colors settle as they cure and as your eye adjusts. Still wrong? It is paint. One more coat in the corrected color is the cheapest design education there is.
The cut is crooked or the hole is in the wrong place. Wood filler, caulk, and touch-up paint exist precisely for this; professionals use all three constantly, they just do not announce it. A misplaced picture hook hole is a two-minute spackle fix. Almost nothing in home DIY is load-bearing regret.
The peel-and-stick will not stick or the board will not sit flush. Surfaces must be clean, dry, and dust-free — re-prep is the fix 90% of the time. For boards, a bead of construction adhesive plus painter’s tape as a clamp overnight solves most flushness sins.
You are halfway in and hate it. Stop, cover the work, and sleep on it. Half-finished projects look terrible almost by definition — judging them mid-way is like reviewing a haircut mid-cut. Finish the steps, then judge. Most “disasters” are simply unfinished.
The Project Planner: Time, Cost & Difficulty at a Glance
Keep this beside your shopping list — it is the honest version of every project in this guide.
Project 1 — Painted furniture. Time: one afternoon plus drying. Cost: $20–$45. Difficulty: beginner. Teaches: prep, priming, smooth painting. Best first project on the list.
Project 2 — Painted interior door. Time: 2–3 hours plus drying. Cost: under $25. Difficulty: beginner. Teaches: rolling flat surfaces evenly, hardware removal. Highest compliments per hour of anything here.
Project 3 — Limewash accent wall. Time: half a day. Cost: $30–$60. Difficulty: beginner (the forgiving paint). Teaches: working in sections, trusting imperfection.
Project 4 — Peel-and-stick backsplash. Time: half a day. Cost: $40–$90. Difficulty: beginner-plus. Teaches: measuring, cutting to a line, patience. The transformation-per-dollar champion.
Project 5 — Plug-in sconces. Time: 1 hour. Cost: $35–$70. Difficulty: beginner. Teaches: finding level, hiding a cord convincingly.
Project 6 — No-sew drop-cloth curtains. Time: 1–2 hours. Cost: $15–$30 per window. Difficulty: beginner. Teaches: the high-and-wide hanging rule, fabric prep.
Project 7 — Board and batten. Time: one full day. Cost: $75–$150. Difficulty: confident beginner. Teaches: layout math, cutting (or store-cut planning), caulking like a professional. The weekend that makes people say “you had this DONE?”
Project 8 — Floating shelves. Time: half a day. Cost: $25–$50 each. Difficulty: beginner-plus. Teaches: stud-finding, load honesty, leveling.
Project 9 — Framing a plain mirror. Time: 2–3 hours. Cost: $20–$40. Difficulty: beginner. Teaches: miter cuts or clean square joints, adhesive work.
Project 10 — Thrifted gallery wall. Time: an afternoon (plus treasure-hunting weeks). Cost: $20–$60. Difficulty: beginner. Teaches: composition, hanging a group level and evenly spaced.
Total for all ten, spread over a season: roughly $300–$550 — less than one mid-range furniture purchase, for a home that looks deliberately, personally made.
The Starter Toolkit, in Detail
Buy first (the honest essentials): a cordless drill-driver, a tape measure you can read at arm’s length, a spirit level at least 24 inches long, a stud finder, a hammer, a utility knife with spare blades, painter’s tape, and a set of foam rollers with one good angled brush. This kit, bought once at mid quality, covers all twenty projects and a decade of household life — roughly $80–$120 if you shop a sale.
Borrow or rent before buying: the saw (until you know DIY is your hobby), a ladder if your ceilings are high, and any specialty tool a single project demands. Hardware stores rent almost everything, and one rental teaches you whether the tool belongs in your life.
Already in your kitchen drawer: a butter knife (paint can opener, forever), old sheets (drop cloths), masking tape, a pencil — actually buy pencils, plural, and accept they will live behind your ear. The best toolkit is the one you can find.
How to Recreate These Projects in the Right Order
Step 1 — Start with one paint project. Furniture first (Project 1) is the safest teacher: small, movable, and if you hate it, it is one piece, not a wall.
Step 2 — Add the no-tool wins. Backsplash, sconces, or curtains — one weekend, dramatic difference, zero commitment anxiety.
Step 3 — Pick ONE build. Board and batten has the biggest transformation per dollar; floating shelves are the fastest. Do not start two builds at once.
Step 4 — Finish with the gallery wall. By now you have painted, leveled, and measured with confidence, and the gallery wall pulls the whole home’s story together.
Step 5 — Keep a project notebook. Paint colors, measurements, and what you would do differently. Future you, standing in the hardware store, will be so grateful.
Going deeper: why this order saves money. The sequence in these projects is not fussiness — it is economics. Anything that makes dust or drips (sanding, painting, drilling) happens before anything soft arrives, because cleaning paint off a new cushion costs more than the patience to wait. Wall work precedes furniture placement because ladders need floor space you will not have later. Textiles and styling come last because they are the reward layer, and because seeing the room bare-but-finished tells you exactly which finishing pieces are worth buying — most people discover they need about half of what they planned. Respect cure times, too: paint that feels dry at two hours is still soft for a day, and a shelf loaded too early will carry the dents forever. Build in this order and each project makes the next one easier, cheaper, and better looking.
Real-Life Problems, Solved
These are the questions real people ask most when a room isn’t working yet, answered for this style.
What’s the fastest DIY fix for a bedroom that feels dull?
Pick one weekend project with big visual impact: paint the wall behind the bed in a soft, muted shade; hang curtain rods close to the ceiling with floor-length panels; or put up a pair of floating shelves for books and plants. Each one changes how the whole room reads.
Budget Guide: Where to Save, Where to Spend
Save on: furniture to paint (thrift stores and marketplace finds are ideal — solid wood pieces with ugly finishes are cheap precisely because of the finish you are about to fix), frames, drop-cloth curtains, and boards cut in-store for free.
Spend a little more on: good paint and primer (cheap paint needs three coats and still looks thin — the savings evaporate), a decent brush and foam rollers, and hidden shelf brackets rated for real weight. Painting supplies you keep forever; buy them once, properly.
A realistic starter toolkit — drill, level, stud finder, tape measure, hammer, utility knife, and a small saw — costs $80–$120 total and covers every project here.
Mistakes to Avoid
Skipping prep. Ninety percent of painting is cleaning, sanding, taping, and priming. The projects that fail almost always failed before the paint went on.
Starting with the biggest project. Confidence is a tool. Earn it on a side table before you batten the living room.
Ignoring drying and curing times. Paint that feels dry is still soft for days. Rushing pieces back into use is how good work gets dents and fingerprints.
Not measuring twice. Especially for backsplash tile and board and batten — write every measurement down, and measure the wall, not your memory of the wall.
Forgetting the renter’s exit plan. If you rent, choose the reversible version of every project and keep the original hardware and fixtures in a labeled box for move-out day.
Your DIY Starter Checklist
- One furniture piece cleaned, sanded, and ready to paint
- Paint, primer, foam roller, and one good angled brush
- Painter’s tape and a drop cloth you actually use
- Tape measure, pencil, and a level
- Stud finder for anything that holds weight
- Cordless drill with basic bits
- Utility knife and metal straight edge
- Wood filler and caulk for the “custom” finish
- A labeled box for original hardware and spare parts
- Before photos — you will want them, promise
Frequently Asked Questions
I have never done DIY. Which project should I honestly start with?
Painting a small piece of furniture — a stool, side table, or wooden chair. It teaches cleaning, sanding, priming, and painting on something you can carry outside, and the transformation is big enough to hook you on the hobby for life.
What tools do I really need for these twenty projects?
A cordless drill, tape measure, level, stud finder, hammer, utility knife, and a basic hand saw cover all ten. Borrow the saw for your first build if you can — you will know quickly whether DIY is your thing before investing more.
Are peel-and-stick tiles and backsplashes really removable for renters?
Yes, the reputable brands are designed for it. Warm them with a hairdryer and peel slowly at move-out, and clean any residue with citrus cleaner. Always test a small hidden corner first, and keep the packaging so you know your product’s rating and removal notes.
How much should I budget for my first three projects?
Painting one furniture piece ($20–$45), plug-in sconces ($35–$70), and drop-cloth curtains ($15–$30 per window) come to roughly $100–$175 total, and those three together will make a room look unrecognizable. Board and batten can wait for month two.
What if I make a mistake halfway through a project?
You fix it the way everyone does: filler for dings, caulk for gaps, another coat for paint, and a patch of peel-and-stick for a bad cut. Almost nothing in these twenty projects is permanent or unfixable — that is exactly why they are on the list.
Final Thoughts
And a last encouragement for the hesitant: every confident DIYer you have ever met started with exactly one wobbly, imperfect first project, and most of them can still point at it in their home. Yours is waiting in this list — one afternoon, one piece of furniture, one honest coat of paint. Start smaller than your ambition, finish completely, and stand back. The feeling you get is the hobby. Everything after that is just more of it.
Save this for later
Save this list and pick your first project today — the side table you have been meaning to deal with counts. One finished project changes how a home feels, and it changes how you feel about every project after it.
Keep reading: 20 Wood Wall Decor Ideas That Add Instant Warmth for more wall transformations that pair with these builds, and 22 Small Living Room Ideas That Make Your Space Feel Bigger to see what your new skills can do in a compact space.
